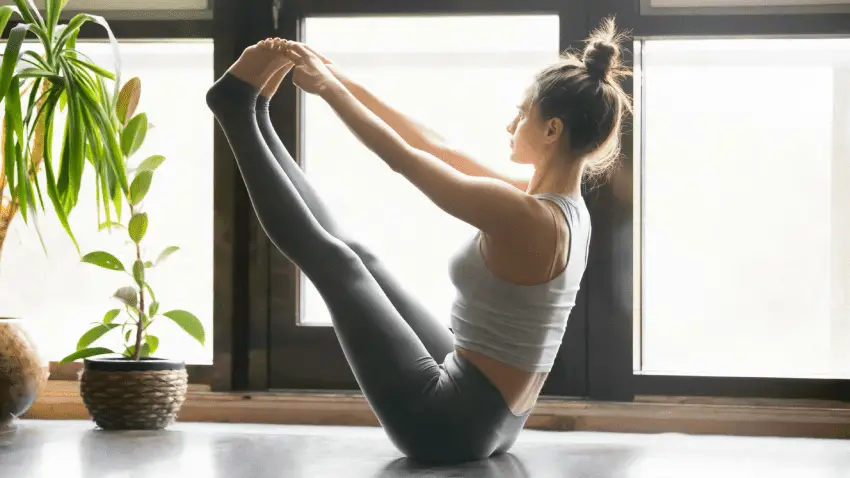
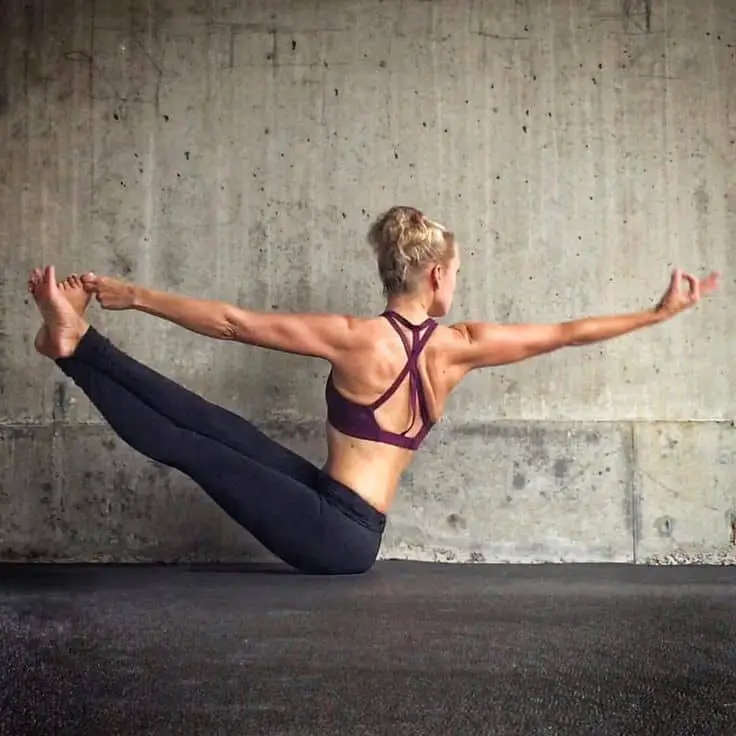
Navasana is the Sanskrit word for boat pose in yoga, with ‘Nava’ meaning boat (also Nauka) and ‘Asana’ meaning a seated position. The boat pose is one of many balancing poses encountered in yoga.
Whether your balancing happens between work or leisure, or family, boat pose yoga is a great way to practice the balance needed in life. Let’s dive into those boat poses variations in yoga.
What is Boat Pose(Navasana) in Yoga?
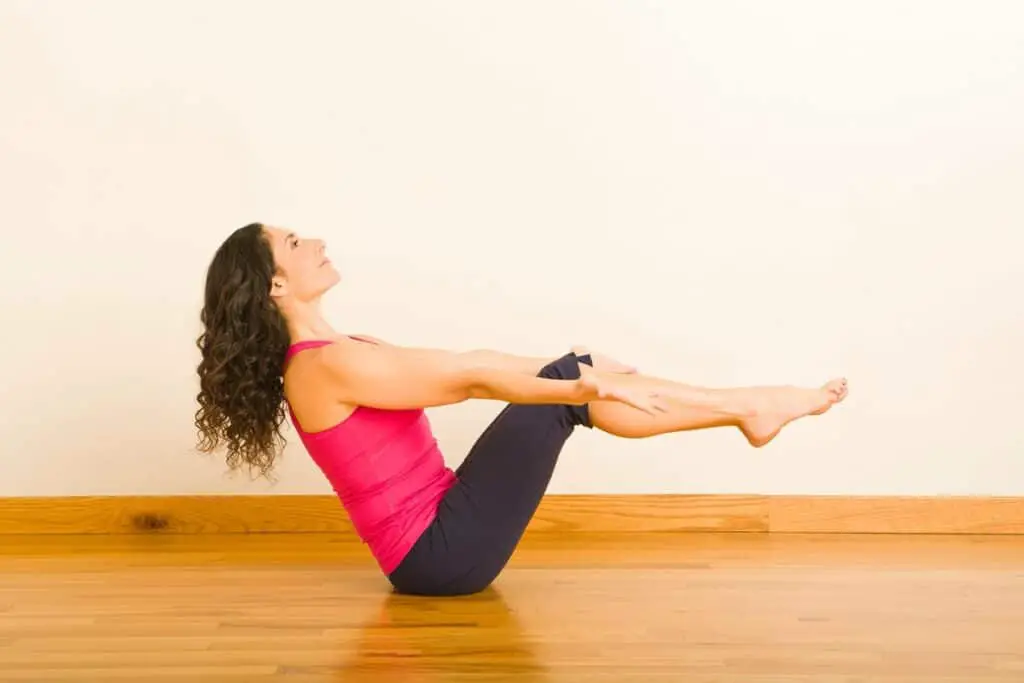
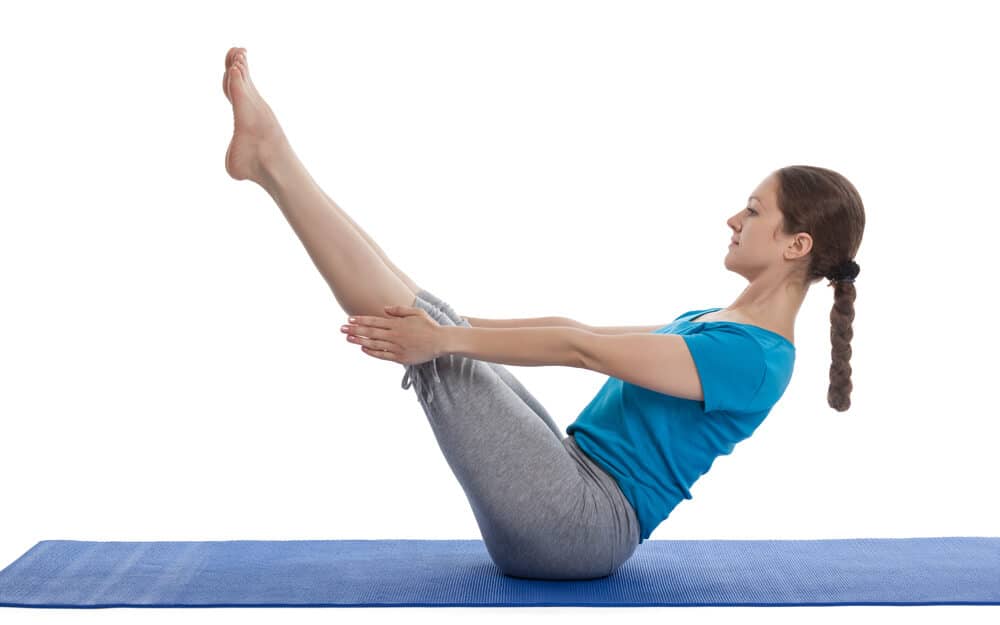
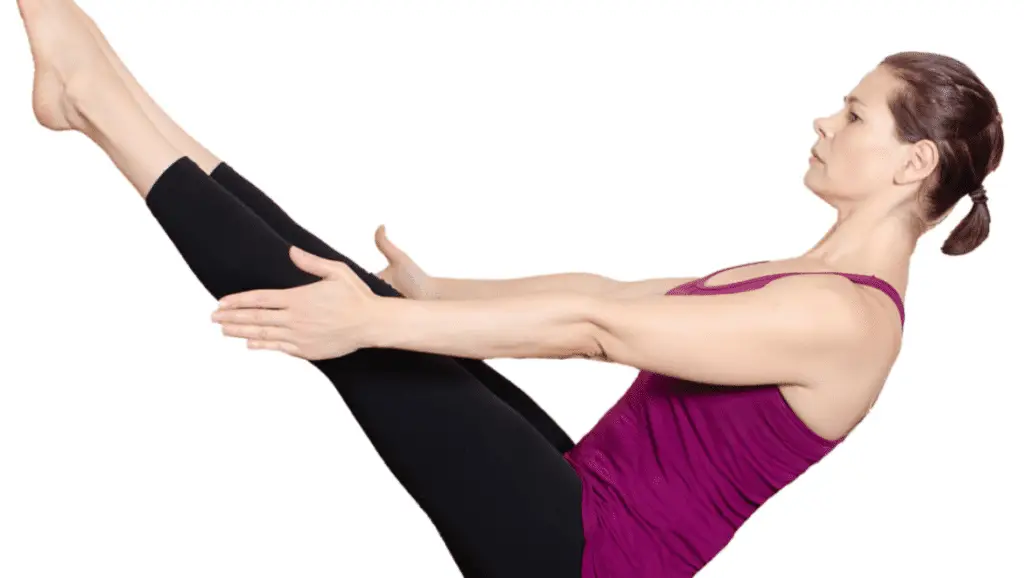
The boat pose, or Navasana, is called the boat, due to the shape it resembles – I’m sure you’ve seen this pose perfectly executed by experienced yogis before. This posture requires balance on the base of your sitting bones and tailbone, with arms and legs stretched and activated. You can almost picture the calming waves carrying you forward in this posture!
Benefits of Boat Pose Yoga
Navasana (Boat pose yoga) is an excellent pose to build mental and physical focus. When done correctly and regularly, the pose invites you to leave all worries off the yoga mattress. The mental focus on the mind with the free and clear thinking and communication in your daily life.
- CORE
Navasana (Boat Pose) is known as one of the main core strengthening postures of yoga.
Drawing back to Ayurveda, they hold a belief in a chakra system. The boat pose engages your core muscles that correspond to your solar plexus and sacral chakras. By strengthening your physical body in this way, you are also healing your energetic body, increasing confidence, and building empowerment.
By targeting the core and abdominal area, this posture also improves digestion. It’s no secret that good digestion is key to physical health and mental focus.
- LEGS/LOWER BACK
On top of that, Navasana engages your thighs to strengthen your hip flexors, adductors (the groin area), and lower back muscles. If you live an especially stressful life physically or mentally, your legs, and especially thighs and knees, will feel the weight of this over time.
This is our body’s natural flight response that, once triggered by adrenaline, sends excessive energy to our legs – to literally be able to run for our lives. This is where the practice of the boat pose comes in handy and alleviates tension that gathers largely in the hamstring area.
- SPINE
All of these areas are strengthened to support the spine and prevent injury in our daily lives. The spine in Sanskrit is known as the ‘dunda’, translating to staff or stick. Using this image of the staff that guides energy along our body, it is easy to see the importance of a steady and straight back.
This is our main line of energy that holds our energetic and physical body upright and moving. The spine is at the center of every yogic posture, including the boat pose.
- BALANCE
The Boat Pose is a valuable posture for getting to know the balance of your body. Balance is not only our ability to walk in a straight line but manifests in many different ways.
Through this pose, get to know the balance between your front and back body and how they differ. In addition, you might also notice differences between the right and left sides of your body. Be patient with all of these ‘sides’ and encourage them to work together to keep you balanced in all aspects of life.
Now that we’ve explored some of the benefits of the boat pose practice, let’s go through it step by step and find out how you can practice this at home.
How to Do Boat Pose Yoga Step by Step
To begin with the boat pose or Paripurna Navasana, make sure you are dressed in comfortable clothing.
Set up your yoga mat in a place that will allow you to feel relaxed and free of distractions. This could be at home or even in nature!
Now you are ready to begin.
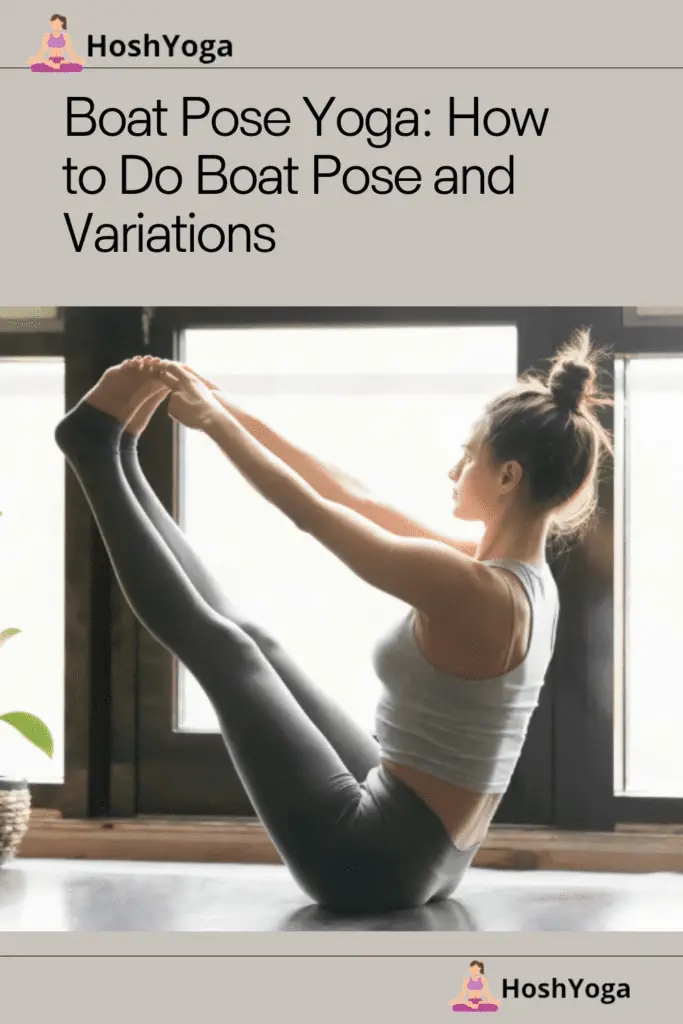
- Sit on the floor with your legs straight in front of you and feet pointing upward. Open up through your hips by gently swaying from one sitting bone to the other – feel the sitting bones come into a comfortable position on the floor and root them firmly. Keep your fingertips on the mat beside your hips.
- Bend your knees. Plant your feet firmly on the ground, hip-width apart. Engage your inner thighs at this point. To train the inner thigh muscles, it might be helpful to use a yoga block between your thighs and squeeze it.
- Still sitting upright, draw your lower belly in and up to lift up through the sternum. With hands still placed at your sides, use this connection with the ground to guide energy to your spine and sit up even taller. To straighten through your spine and draw your lower belly in, try pulling your navel up and back to meet your spine.
- As you exhale and focus on the spine, lean back slowly to find the groove between your sitting bones and tailbone. At this point, engage your core and maintain a connection with your spine to avoid rounding your upper or lower back.
- With your hands still on the ground for support, lift your feet off the floor. You can lift the feet one by one at first, to gauge your ability and level of comfort.
- Once comfortable, raise both feet in line with the knees still bent and shins parallel to the floor. At this point, your back and thighs should already form a letter ‘V’ shape and start to feel the body begin responding to the balancing.
- If you feel comfortable at this stage, raise your arms in front of you, reaching forward, parallel to the floor with palms facing in. Stretch through the fingers and keep your belly flat and firm. At this stage, pay attention to your shoulders to keep your chest open. To avoid a rounded upper back, round through the shoulders to draw the shoulder blades down and back to meet together at the spine. Try holding the backs of your thighs for support.
- At this stage, feel free to raise the tips of your toes slightly above eye level and flex through the heels out toward the sky. Don’t forget to take deep calming breaths and lengthen through the space between your ears and shoulders.
- Stay in the pose and see what comes up. If you find yourself starting to shake or grow frustrated, send your breath there and paint a mental picture to ease the tension. Stay in the pose for about 10-20 seconds or about 5 breath cycles. As you train your muscles and engage in daily practice, you will find this pose progressively easier and could even hold it for up to 10 breath cycles.
- Bring your feet to the ground slowly and with control. Return your spine to a position perpendicular to the floor.
Now that we have examined the traditional formation of the Boat Pose, let’s look at some variations and adaptations.
5 Boat Pose Variations
Variations of poses allow you to customize the experience to better suit your needs and comfort. The point is to feel it out every step of the way and not rush yourself.
Bent Knee Boat Pose
This variation is designed to take the pressure off your lower back and work to keep your spine tall. Use this variation to ease yourself into the full position. To practice this posture, follow the guide above and stop with step 7.
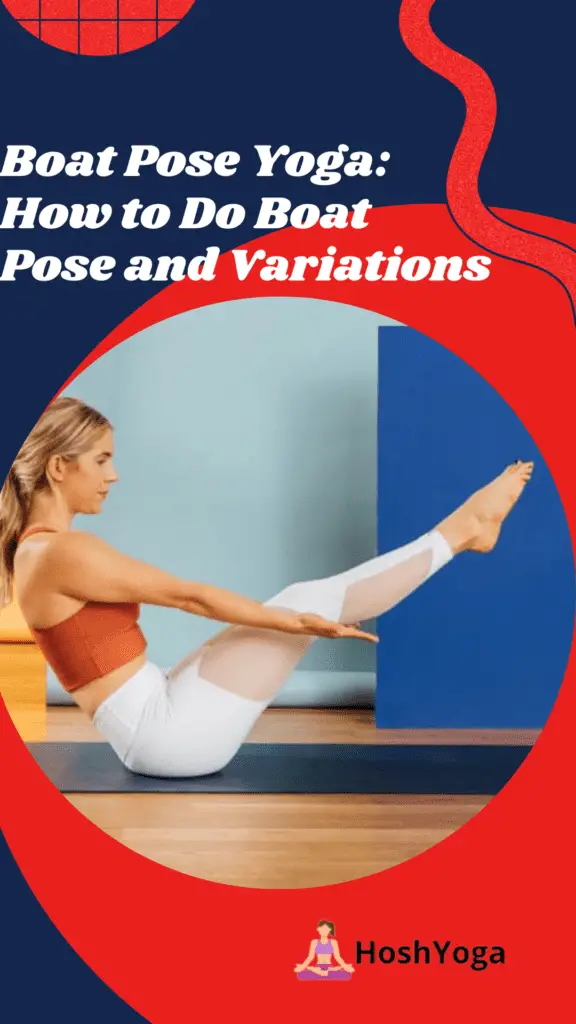
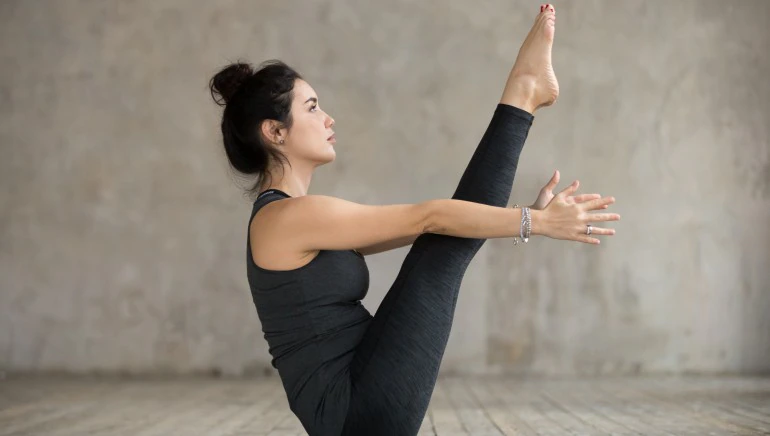
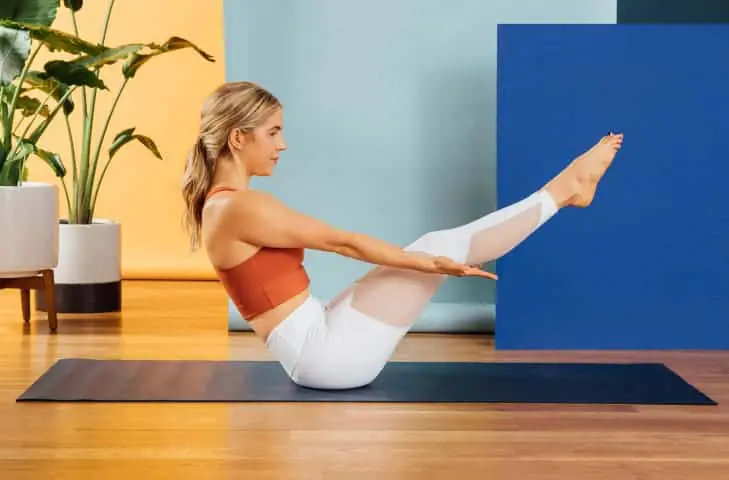
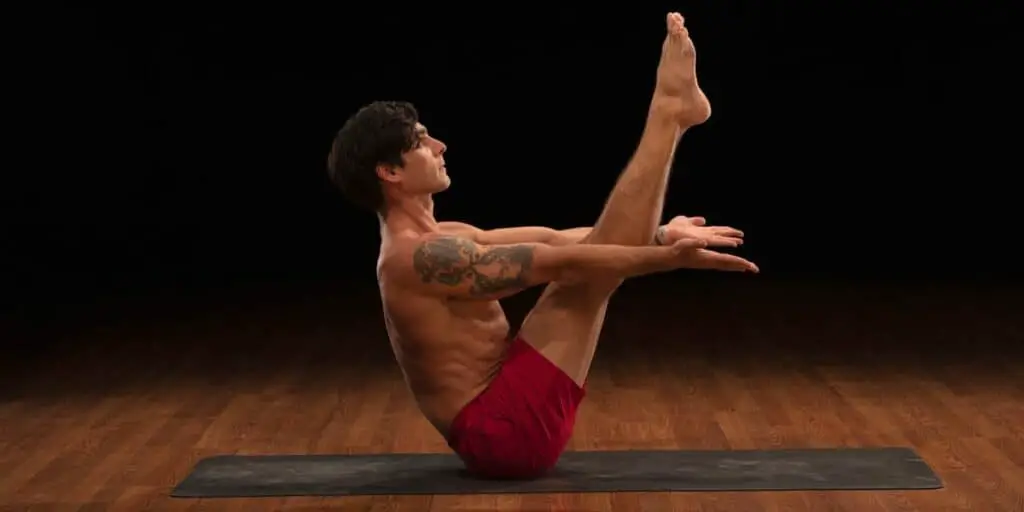
Paripurna (full) Navasana
This variation includes straightening of the legs to resemble a full V shape with the body. This variation is already considered advanced and requires flexible hips and hamstrings, which most people that live largely stationary lives do not possess. Proceed with caution and follow the above instructions until the end.
Ardha (Half) Navasana
This position can be used as an entry into the traditional Boat Pose or can be practiced on its own to exercise the abdominal muscles.
- Lie down flat on your mattress with legs and arms outstretched, feet together.
- As you exhale, begin to lift your chest and feet up and away from the ground, with your hands turned toward the body and reaching toward the toes. You should feel your abdominal muscles contract here.
- Even in this position, make sure your shoulders don’t round through, but stay down to open your heart up to the sky. The weight is still rooted in your sitting bones, so feel the power drawing up from there.
- To practice this variation, draw upward with your exhale and release back down on an inhale. Repeat this for a few breath cycles to get a feel for your abdomen.
Ubhaya Padangusthasana – Big Toe Boat Pose
This variation combines core and balance work with a deep stretch of the hamstrings.
- Starting in the Butterfly pose (Baddha Konasana), loop your index fingers around your big toes.
- Shift your weight onto the sitting bones and open up through your chest, drawing down with the shoulders, as you lift your knees toward the ceiling.
- Slowly stretch your legs out in front of you, while making sure to lengthen and straighten your spine.
- Gaze up toward your toes and smile!
Parivrtta Navasana – Revolved Boat Pose
This variation introduces a gentle twist into the spine and lengthens through the sides of your torso. Twists are a good way to improve the spinal cord’s range of motion.
- From the traditional boat pose, loop your right big toe with your left hand.
- On an exhale, twist to the right and open up through your chest, while extending the right arm to the side.
- Look past your outstretched hand and smile.
Beginners Tips for Boat Pose Practice
As with all postures in yoga, work to find how your body responds to these motions and use your breath to free up any tension you come across. As I mentioned earlier about Pranayama, the goal of this posture and any yogic practice is to breathe through the discomfort.
Feel the heat and acknowledge the tension you experience. Be mindful of the places in your body where you might gather tension, such as your face or your neck.
Work to extend, expand and open your body up toward the sky. Your breath in this posture should be smooth and flowing, to resemble calm water to carry your boat ahead and afloat. If you notice your breath start to grow shallow, that is your sign to back off a bit and take it slow.
Conclusion
Now that you’ve been introduced to the benefits and execution of the boat pose yoga and boat pose variations, you can proceed at your own discretion and try it for yourself. The boat pose purposefully inspires full-body awareness to ground you at the moment and focus on only that which is immediate. This is a wonderful practice to have, especially with the demands of daily life.
The point is to listen inward and take it at your own pace.
Let me know your thoughts on Navasana and its variations in the comments below. Do you use the boat pose in your daily practice?