Bikram Yoga is famous for its rigid structure and challenging classes. Bikram Yoga consists of 26 Poses, always performed in the same order. However, the heat and humidity of Bikram Yoga studios make it one of the hardest forms of Yoga.
If you would like to learn more about this difficult form of Yoga, continue reading. We will discuss what Bikram yoga poses are, as well as the benefits of practicing Bikram Yoga postures.
What is Bikram Yoga?
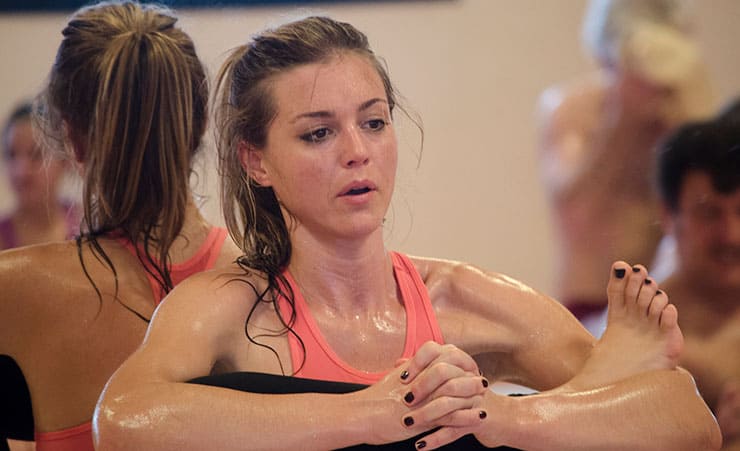
Bikram Yoga is widely regarded as one of the most difficult forms of Yoga and for good reason. Developed in the middle of the 20th century Bikram Choudhury, this form of Yoga was one of the first kinds of Hot Yoga to become popular in the West.
Bikram Yoga sets itself apart from traditional forms of Yoga in two ways. Firstly, Bikram Yoga is a form of Hot Yoga. This means that students will practice in uncomfortable temperatures to develop discipline and improve their ability to stretch. Most Bikram studios practice in temperatures of at least 41 degrees Celsius with high humidity levels, usually over 40%.
The second aspect of Bikram Yoga that sets it apart is its relatively rigid format. All Bikram classes last 90 minutes and revolve around completing 26 poses. We will discuss what these poses are later in this article.
While Bikram is a fantastic way to burn calories, the heat and relatively static structure may not be suitable for new Yogis or Yogis that prefer more variety in their classes.

How Many Calories Does Bikram Yoga Burn?
Bikram Yoga is a fantastic way to burn calories. The combination of tough poses, long sessions, and high temperatures, makes Bikram Yoga an excellent way to burn calories and lose weight.
According to a 2014 study from Colorado State University, a 90-minute session of Bikram Yoga can burn between 350 and 500 calories.
Traditional Yoga burns between 180 and 300 calories in a 60-minute class, meaning that Bikram Yoga is a much more effective way to burn calories than traditional Yoga classes.
What Do You Need for Bikram Yoga Practice?
While Bikram Yoga, like all forms of Yoga, does not require a lot of equipment, it does require a little bit more than traditional forms of Yoga for a few reasons. Firstly, due to the increased heat and humidity, your equipment may break down more quickly than in traditional Yoga. Another important factor is that Bikram Yoga can be strenuous and sweaty, which means you may need more and different kinds of equipment.
To practice Bikram Yoga, you should have at least a few of the following pieces of equipment:
- Light Clothes: Bikram Yoga’s heat and humidity mean that you should avoid clothes made of cotton and other heavy materials. Light Yoga pants or cycling shorts, as well as sweat-resistant training shirts, are a great investment.
- Water: You need water to practice Bikram Yoga. Without enough water, you will get dehydrated, making it harder to practice safely. Therefore, make sure you buy a large water bottle that can prevent evaporation.
- Yoga Mat: While a traditional Yoga mat can work for Bikram Yoga, there are mats specifically designed for Bikram Yoga. These mats are more resistant to sweat, making them a great choice for this practice.
- Towels: Bikram Yoga will cause you to sweat. Due to this fact, you should bring a towel, maybe even more than one. You may need a towel to wipe down your sweat and to prevent your mat from getting saturated.

26 Bikram Yoga Postures/Asanas for You Try
1: Standing Deep Breathing: Pranayama
Breathing is vital for Bikram Yoga. Breathing helps you maintain your focus and gives your muscles the oxygen they need to hold the most difficult poses. Every class starts with some Standing Deep Breathing to prepare each Yogi for the challenges ahead. This pose is excellent as it opens up your airways and allows you to inhale the maximum amount of air. To do this pose, you need to:
- Clasp your hands together with your fingers interlaced. Rest your hands beneath your chin.
- Keep your shoulders relaxed and your body in a straight line.
- Breathe deeply in for 5 seconds and out for 5 seconds.
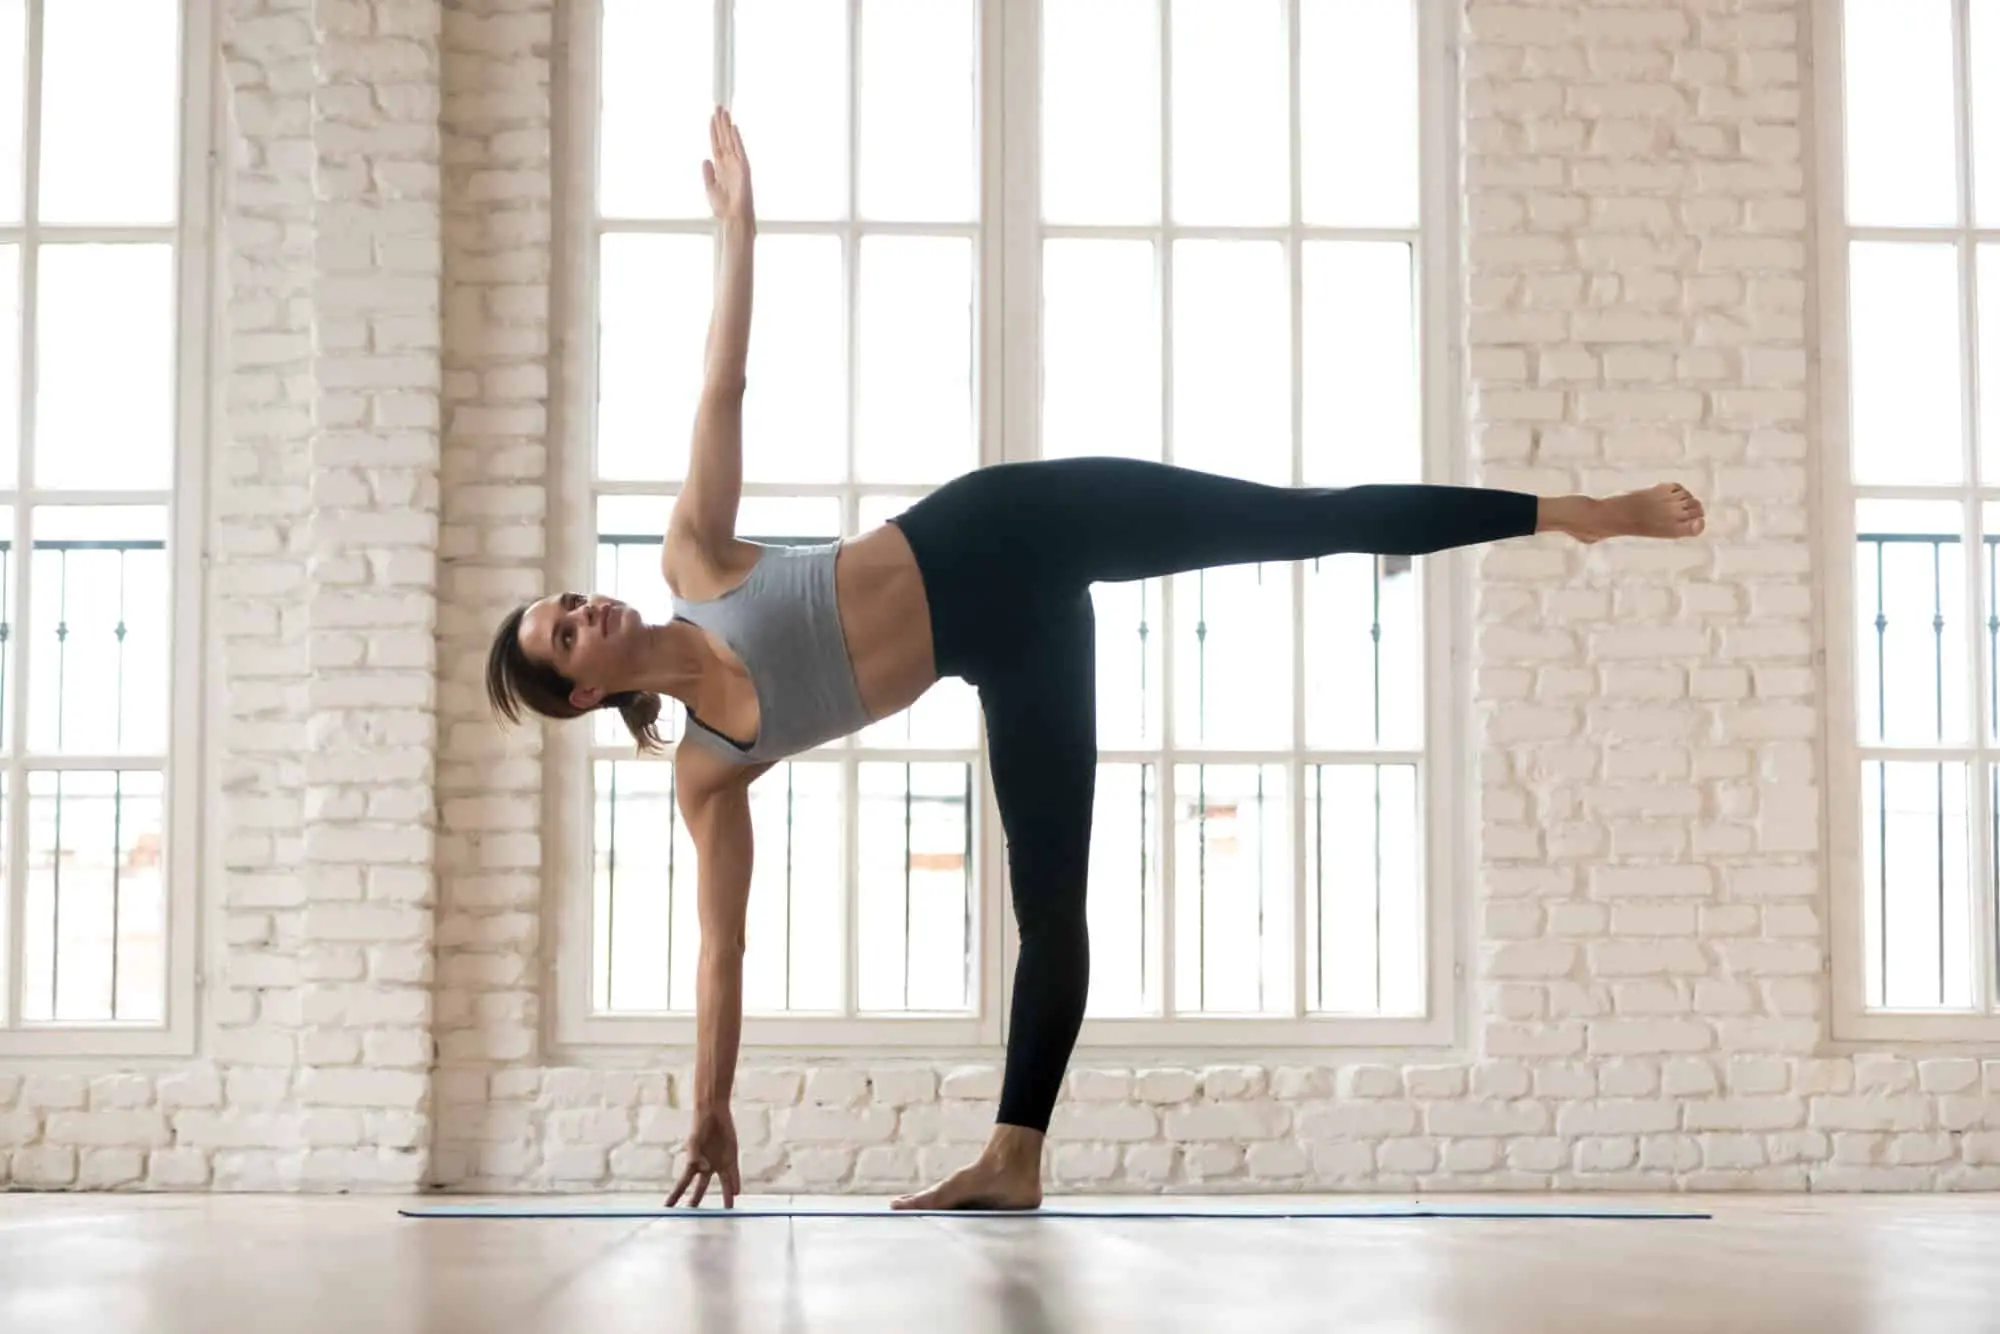
2: Half Moon Pose
Bikram Yoga starts with quite a challenging pose. The Half Moon pose will test your balance and leg strength. However, if you can perform this pose well, you will notice increased arm, leg, and core strength. There are a few steps in this pose:
- Start in the Triangle pose before shifting your weight forward onto your right leg.
- Bring your right fingertips to the floor.
- As you straighten your right leg, lift your left leg off the floor. Make sure that your left hip is on top of your right hip.
- Activate your core as you point your left arm upwards and your left leg parallel to the floor.
- Hold this position for at least 10 seconds.

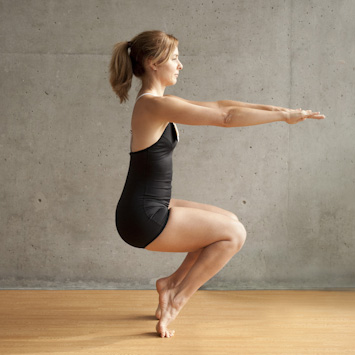
3: Awkward Pose
The Awkward pose is just as the name implies. This pose is almost like a more complicated squat and will really test your balance. If you want to develop a strong core and legs, you should practice this pose. To do the Awkward Pose, you need to:
- Begin in a squatting position, with your thighs and arms nearly parallel to the floor.
- Keep your pelvis below your ribcage. Raise yourself onto the balls of your feet.
- Hold this position for 5 deep breaths.
4: Eagle Pose
If you need to develop your posture and core strength, practice the Eagle Pose frequently. In Bikram Yoga, this pose is particularly challenging due to the heat and humidity. Given this fact, make sure to stay focused and calm when performing this pose. To perform this pose, you need to.
- Begin in the Mountain Pose.
- Extend your arms straight to your side.
- Wrap your left leg around your right leg, and bend your knees.
- Point both arms in front of you and wrap your arms around each other. Make sure that you are well balanced when completing this step.
- Stay in this position for at least 5 deep breaths.

5: Standing Head-to-Knee Pose
The Standing Head-to-Knee pose is one of the most difficult poses in Bikram Yoga. This pose requires incredible balance and core strength. If you can do this pose well, you will be able to develop excellent flexibility and core strength. There are a few steps in this pose:
- Begin in the Mountain Pose and shift your center of gravity to your right foot. Lift your left leg by bending the knee. Grab your left foot as your knee touches your chest.
- Activate all your leg and core muscles to hold this position.
- Straighten your left leg out in front of you. Hold on to your foot with both of your hands.
- As you do so, bend your back, tuck your chin inwards, and keep your elbows tight.
- Hold your foot outwards for at least 10 seconds.

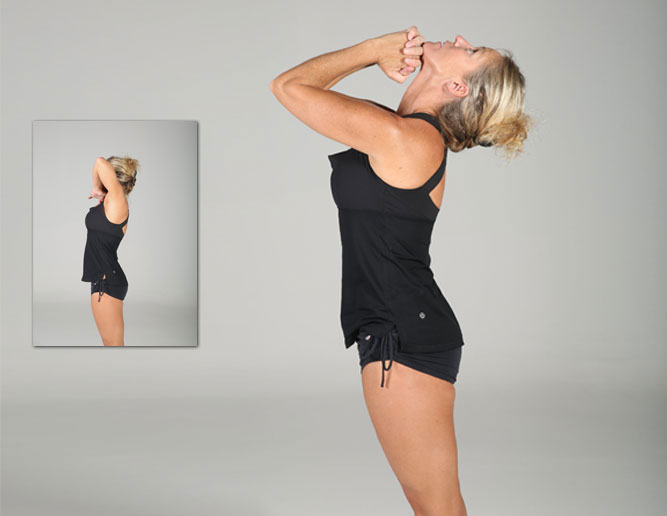
6: Standing Bow-Pulling Pose
The Standing Bow-Pulling Pose is one of the best ways to develop your abs and improve your balance. This pose will also tone your thighs and core. To perform the Standing Bow-Pulling Pose, you will need to:
- Stand up straight with your arms by your side. Bend your right leg and grab your right foot.
- Raise your arm upwards and bend forward. As you do this movement, raise your right leg upwards.
- Your goal is to bend your torso forward so that it is parallel to the floor.
- Hold this position for between 5 and 10 breaths.

7: Balancing Stick Pose
The Balancing Stick Pose is one of the most challenging poses in all of Bikram Yoga. However, the Balancing Stick Pose is not mechanically complicated. This pose will develop your core and leg strength dramatically. To perform this pose well, you will need to:
- Start in the Mountain Pose. Interlock your hand and raise them above your head.
- Push your hip forward while bending your lower back.
- Take a step forward with your right leg.
- Lower your body and lift your left leg. You want your left leg and head to be in a straight line.
- Hold this position for at least 10 seconds.

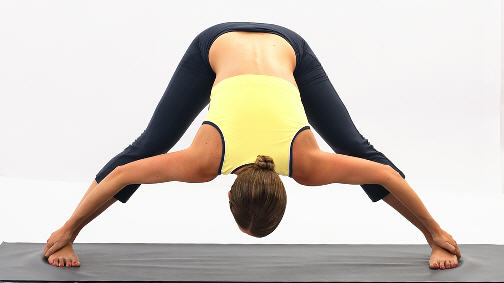
8: Standing Separate Leg Stretching Pose
If you need to open up your hips and stretch your hamstrings or calves, then you should practice the Standing Separate Leg Stretching Pose. This pose will give your legs a great stretch while also improving circulation throughout the body. To complete the Standing Separate Leg Stretching Pose, you will need to:
- Stand up straight before taking one step out to the left and right. Keep your feet pointing forward.
- Bend forward at the waist.
- Grab your ankles with your hands and hold this position for five deep breaths.
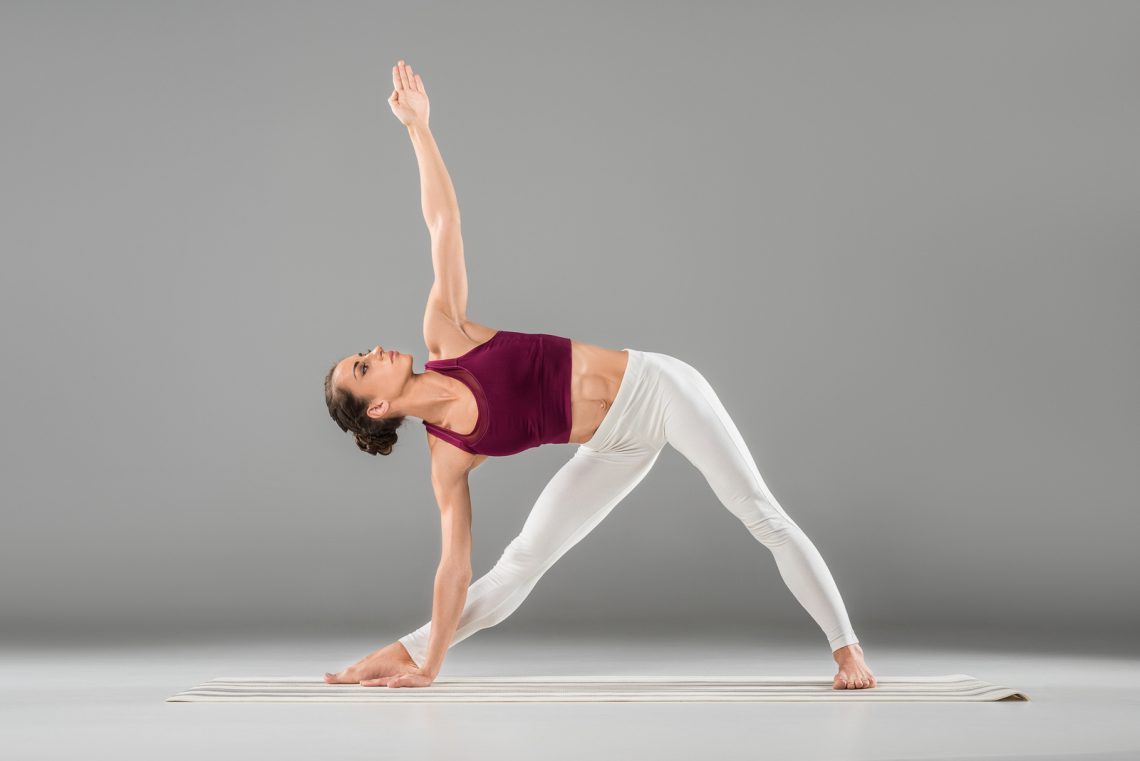
9: Triangle Pose
The Triangle Pose is an excellent way to improve your balance. This pose also has many other benefits, including increased leg strength and hip flexibility. To practice this pose, you need to do the following:
- Start in Warrior 2 and straighten your right leg. Stretch your right hand outwards.
- Move your right hand down to either your shin or ankle.
- Raise your left hand to the ceiling, with your shoulders one on top of the other.
- Look upwards and hold this position for between 5 and 10 breaths.
10: Standing Separate Leg Head to Knee Pose
The Standing Separate Leg Head to Knee Pose is an excellent pose for Yogis that need to stretch their spine and lower back. This pose is also simple to perform, making it a great way to relax mentally in the middle of a tough session. To do this pose, you need to:
- Start in the Mountain Pose and take one step forward with your right leg.
- Keeping both legs straight, bend forward at the hips. Touch your knee with your forehead.
- Let your hands rest on the ground and hold this position for 30 seconds.

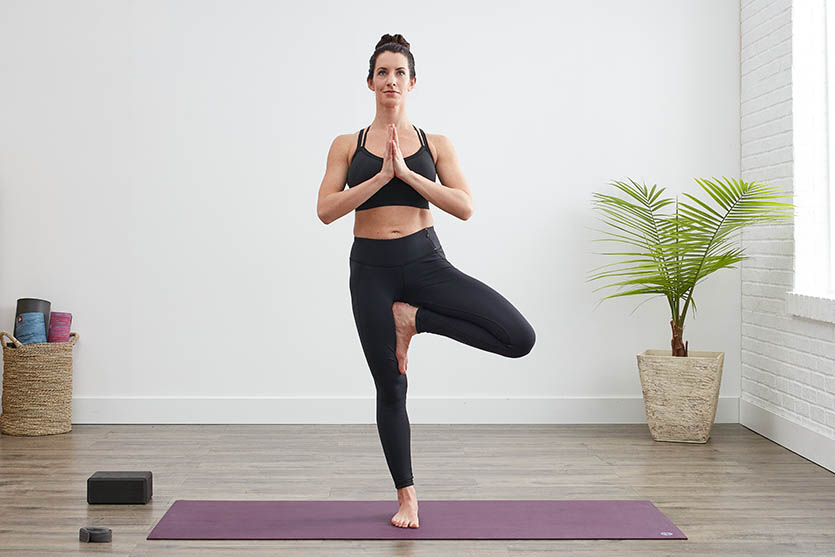
11: Tree Pose
In Bikram Yoga, The Tree pose will challenge your leg strength and balance. However, this pose is a fantastic way to develop both. Make sure to stay calm when you perform the Tree Pose. To perform this pose, do the following:
- Begin in the Mountain Pose.
- Point your right knee to the mat before bringing your right foot up to the opposite thigh.
- Lift your clasped hands to either your chest or head.
- Stay in this position for 5 breaths. Switch to the opposite standing leg.
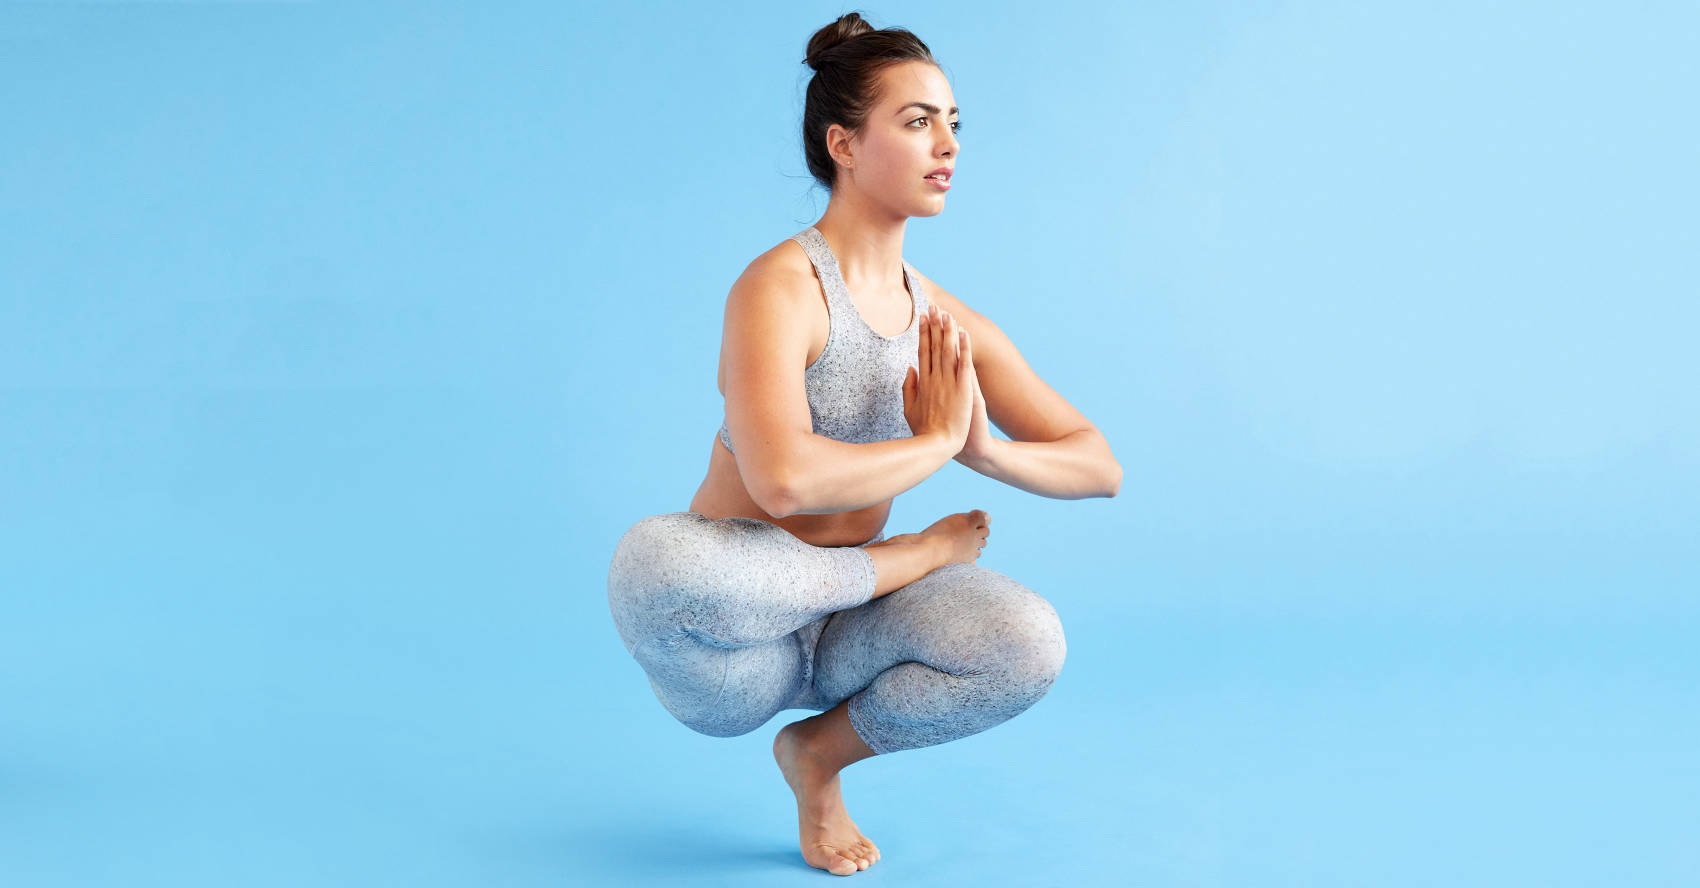
12: Toe Stand Pose
The Toe Stand pose is easily one of the most challenging poses in Bikram Yoga. It requires superb balance, focus, and leg strength. However, if you can master this pose, your entire Yoga practice will benefit. To do the Toe Stand Pose, you must:
- Stand up straight on your right leg and move your left foot to the top of your right thigh.
- Bend your right knee and lower yourself towards the floor.
- In this squatting position, raise yourself onto the ball of your foot. Make sure to keep your center of gravity beneath your heel.
- If you can, keep your hands in front of you in a prayer position. If not, use them to stabilize your body by pressing your fingers into the mat.
- Hold for 5 breaths.
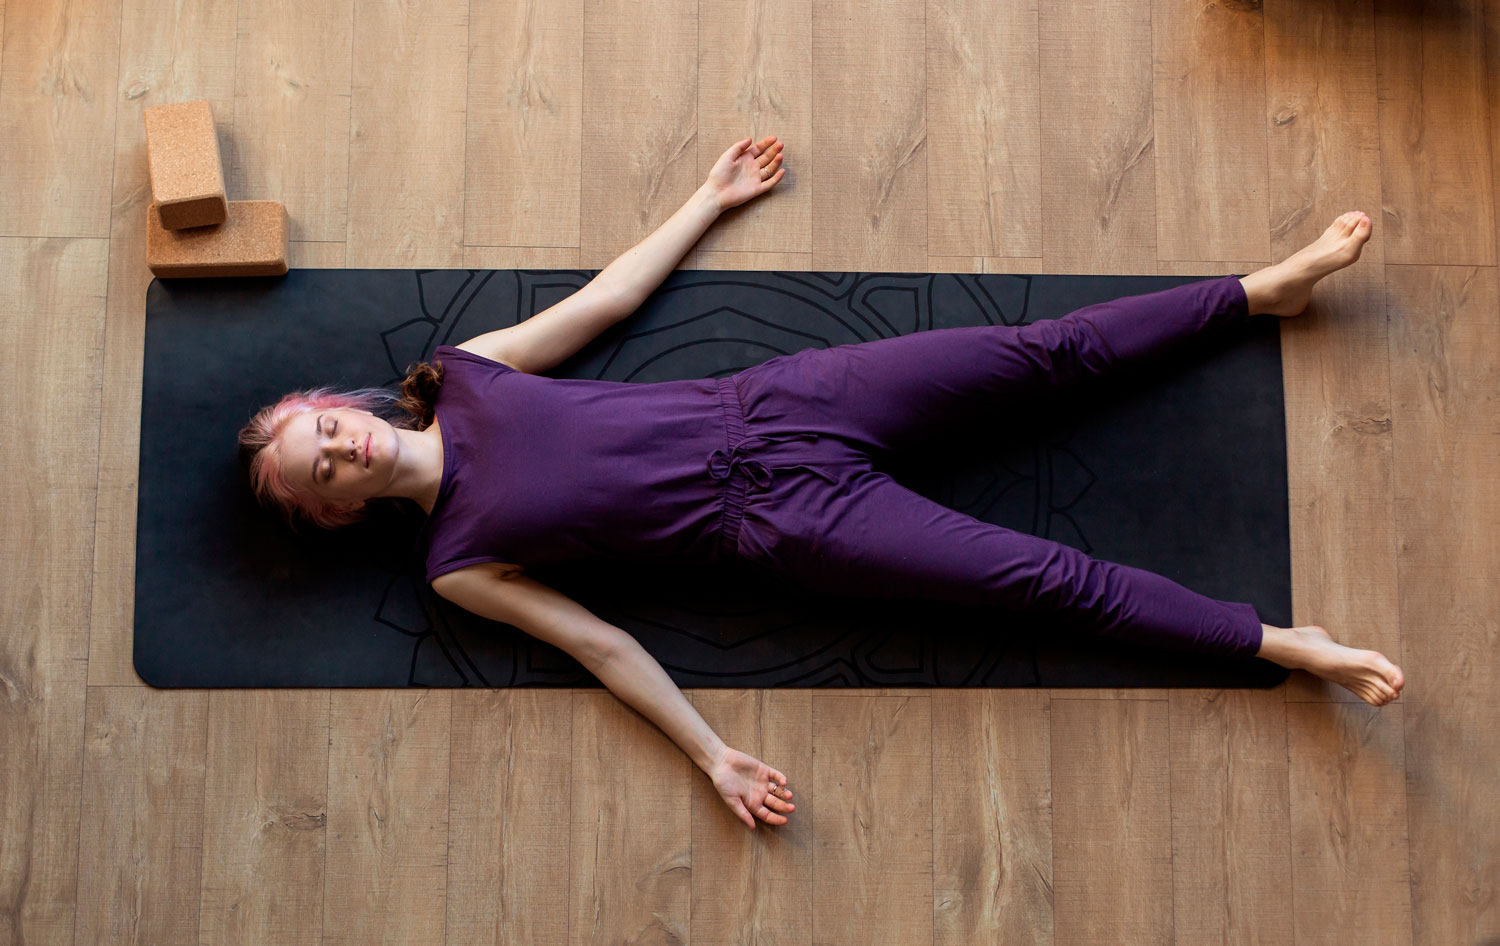
13: Corpse Pose
Corpse Pose is a chance to relax and recover in the middle of your Bikram Yoga class. This pose will develop your ability to meditate, making it a great way to relieve stress. To do the Corpse Pose, you need to
- Lie down on the flat of your back with your palms facing up.
- Breathe in and out as you relax every part of your body.
- Stay in this pose for as long as necessary.
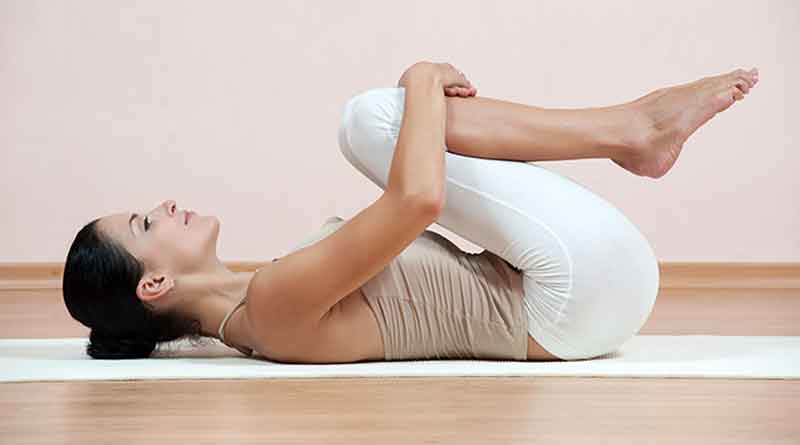
14: Wind Relieving Pose
Wind Relieving is, while also a relaxing pose, is one of the best ways to stretch out your knees and lower back. This pose is relatively simple to perform, and involves the following:
- Lay down on your back. Keep your legs below your pelvis.
- Pull both knees to your chest until you feel a stretch in your back.
- Let one leg drop down while holding your right leg.
- Repeat on the opposite side, holding both for at least a minute.
15: Sit Up Pose
The Sit-Up is one of the most common forms of exercise the world over, so it is no surprise that it appears in Bikram Yoga. This pose is famous for a reason; it is a great way to develop the muscles in your core and boost your energy levels. To practice this pose, do the following:
- Start by laying down on your back.
- Wrap your hands together and place them behind your head. Bend your knees.
- Press your lower back into the mat and activate your core as you lift your upper body off the mat.
- Repeat as many times as you can.
/GettyImages-523277402-cc780316bae6430585b13b5fcb8635a7.jpg)
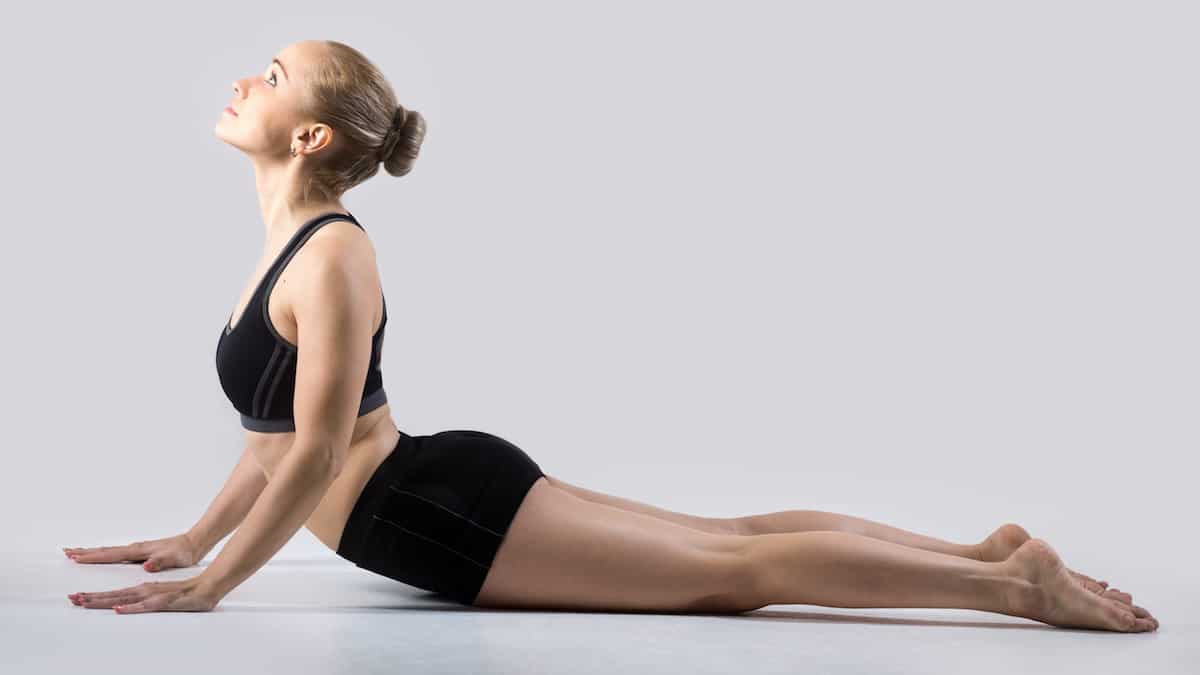
16: Cobra Pose
The Cobra pose has many benefits. This pose opens up your chest, stretches your lower back, and develops the muscles in your core and chest. The Cobra Pose involves the following steps:
- Lay on your stomach with your hands by your side.
- Lower your thighs and toes into the mat. As you do so, press your hands into the mat.
- Lift your shoulders and heads upward while keeping your stomach connected to the floor.
- Hold this position for 5 breaths.
17: Locust Pose
Salabhasana, or the Locust Pose, is similar to the Superman Pose. However, this pose is a little easier, making it a fantastic pose for developing the muscles in your core and upper chest. To do this pose well, do the following:
- Start on your stomach. Your hands should be at your waist and legs in a line below your hips.
- Activate your inner thighs and quads before raising your head and legs.
- Your goal is to lift your knees and sternum off the floor. Hold this position for several deep breaths.
Here is a video of how to perform the Locust Pose.
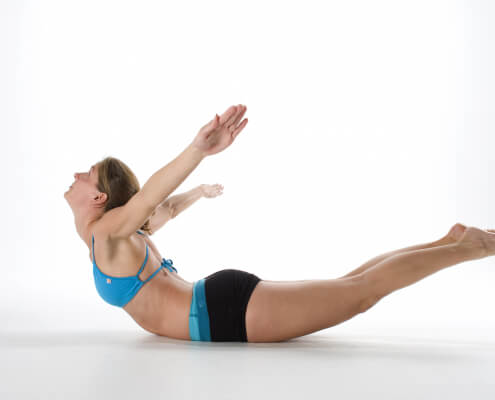
18: Full Locust Pose
If you can perform the traditional Locust pose without much difficulty, then the Full Locust pose is the challenge you need. This pose is an even better way to develop your core muscles, as well as improve the flexibility of your lower back and spine. To perform the Full Locust Pose, you need to:
- Lay down on your stomach and move your hands underneath your pelvis. Make sure your pinkie fingers touch.
- Push your forearms and upper body into the mat as you lift both legs as high as you can.
- If possible, bend your knees and try to bring your feet over your head.
- Hold this position for as long as possible.
19: Bow Pose
The Bow Pose is a challenging pose at the best of times but is especially difficult in the humid environment of Bikram Yoga. However, the pose is an excellent way to stretch your back, shoulders, and legs. To do the Bow Pose, you need to:
- Start out by laying down on your stomach.
- Grip your feet with your hands as you bend your knees.
- Lower your pelvis into the mat.
- Expand your shoulders and hold this position for at least 5 breaths.

20: Fixed Firm Pose
If you need a pose that will improve your flexibility and strength, then the Fixed Firm pose is an excellent choice. This pose is performed near the end of most Bikram Yoga classes, meaning that you may struggle to perform it technically correctly if you are tired. To practice this pose, follow these steps:
- Start in a kneeling position with your thighs on top of your calves.
- Bend back at the hips and rest your hands on the mat. Keep them facing forward and beneath your shoulders.
- Lower your upper chest and elbows. Start to look upwards as you do so.
- Fall even deeper into the mat as you bring your shoulders down. Rest your arms on your feet and calves.
- While keeping your stomach in the air, lift your arms above your head. Grab your elbows with the opposite hand and hold this position for at least 5 breaths.
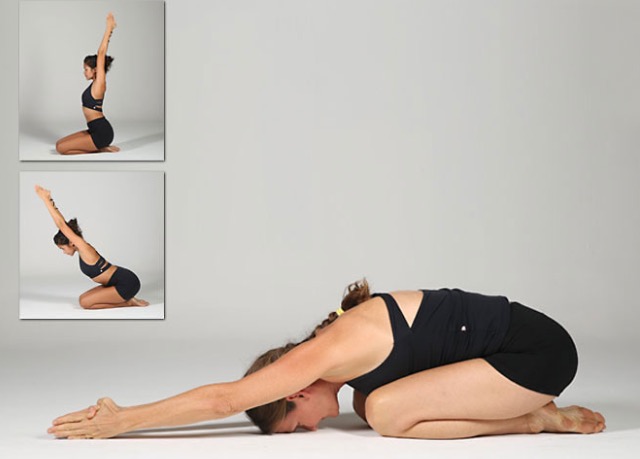
21: Half Tortoise Pose
If you know how to perform the Child’s Pose, the Half Tortoise Pose shouldn’t feel too different. The Half Tortoise is a relaxing pose that opens up your lower back while also expanding your chest, making it easier to experience deeper breathing. This pose involves the following steps:
- Start in a kneeling position. Keep your hands on your thighs.
- As you inhale, lift your hands above your head and bring your palms together.
- Lower your body at the hips and stretch forward. Your pinky fingers and forehead should touch the floor or mat.
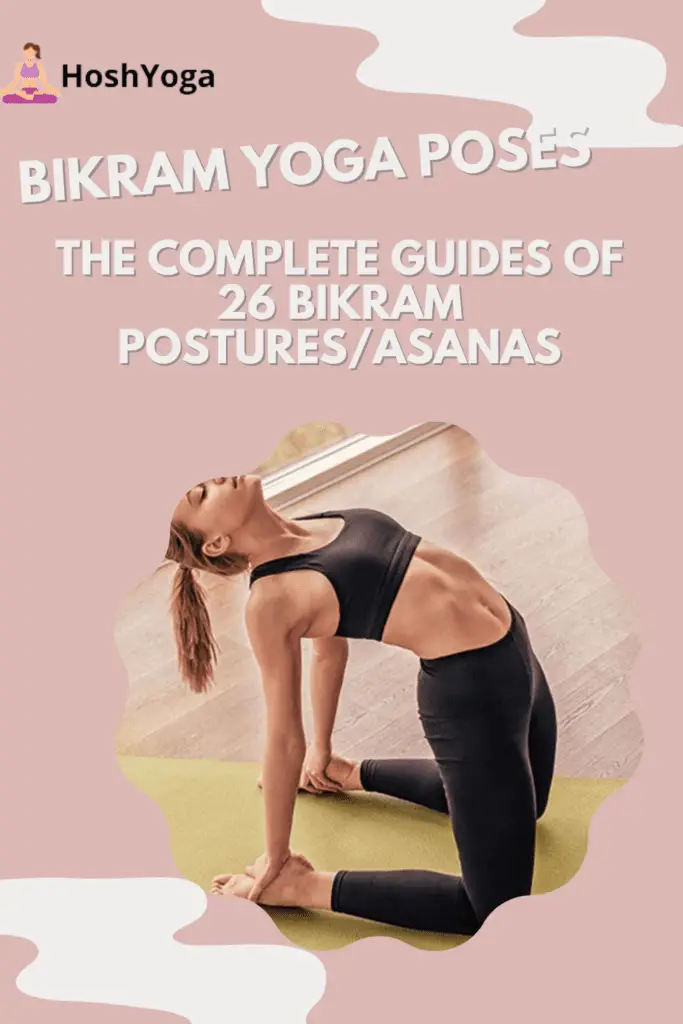
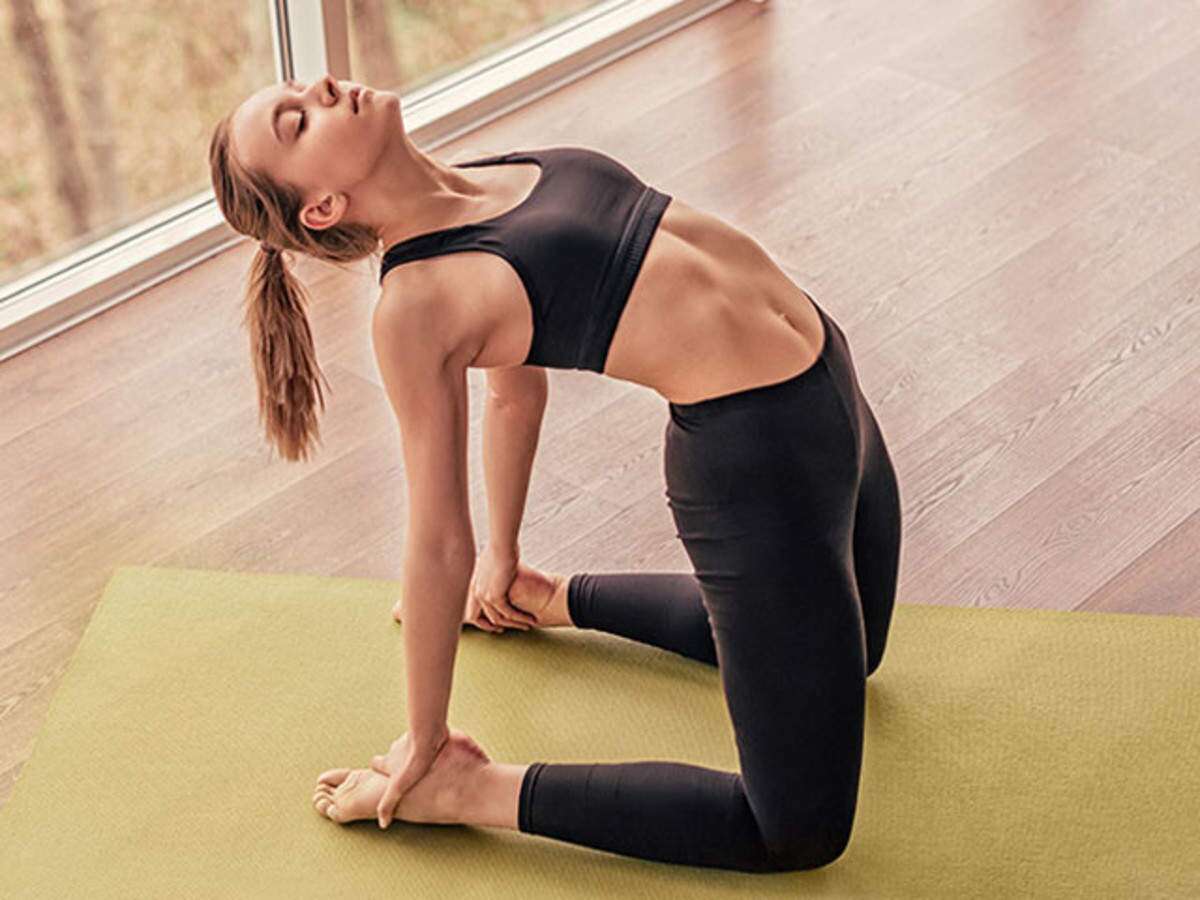
22: Camel Pose
Ustrasana is one of the best Yoga poses to develop your spinal flexibility while allowing you to cool down near the end of a tough class. The Camel Pose is also a great way to develop the muscles in your core and shoulders. To do this pose, you need to:
- Begin by kneeling down. Open up your chest by breathing in and out deeply.
- Push your hips forward while grabbing your feet.
- Let your head roll backward. Make sure you do not feel any tension in your neck.
- Hold this position for at least 5 or 10 breaths.
23: Rabbit Pose
Sarvangasana or, as it is known in English, the Rabbit Pose, is a great way to stretch out your spine and arms. This pose is easy enough to perform, making the Rabbit Pose great for new Yogis. To perform the Rabbit Pose, you need to:
- Start in the Child’s pose. Pull your forehead towards your knees. Make sure to keep your head on the floor or mat.
- Breathe in and raise your hips upwards. Roll forwards slightly and push your forehead as close to your knees as possible.
- Breathe in and out for between 15 and 30 seconds.

24: Head-to-Knee Pose and Stretching Pose
The Head-to-Knee pose, also known as Janu Sirsasana, is an excellent way to stretch your hamstrings and calves. As well to these benefits, the Head-to-Knee pose is an excellent way to stretch out after more challenging poses. This pose involves the following steps:
- Sit down with your feet out in front of you.
- Bend your left knee. Next, bring your left foot next to your right thigh.
- Lower your pelvis as you reach your arms outwards. Your goal is to touch your foot. Don’t worry if you cannot touch your foot. Go as far as you can.
- Hold this position for at least 30 seconds.

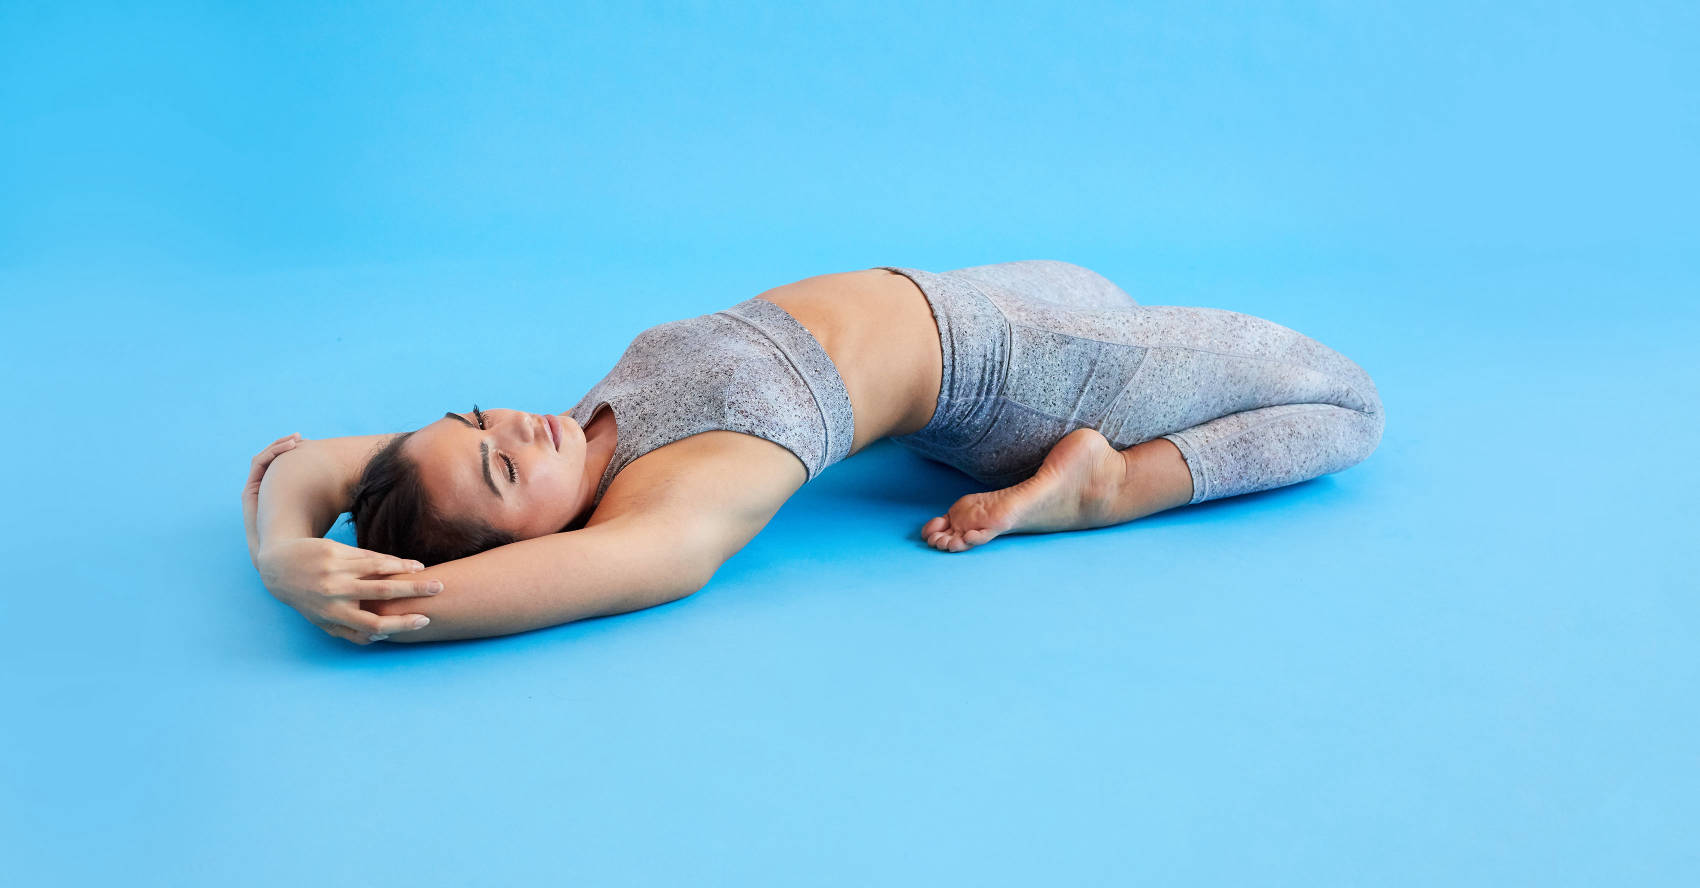
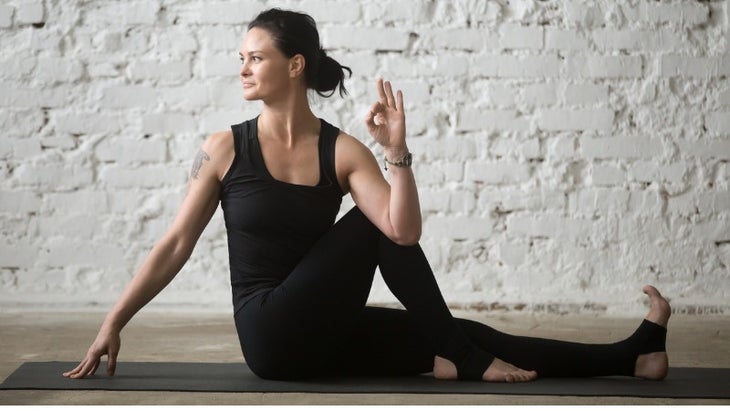
25: Spine Twisting Pose
The Spine Twisting Pose is a fantastic way to improve the flexibility in your hips and your back. By doing this pose, you can relieve any lower back pain you may be struggling with. To perform the Spine Twisting Pose, you need to:
- Sit on your bottom and press your right hand into the mat behind your hip.
- Lift your left arm upwards. As you do so, bring your right knee to your chest and your right foot to the outside of your left leg.
- Press your left elbow into the side of your right knee.
- Hold this position for between 5 and 10 breaths.
26: Blowing in Firm
After a hard session, you will need to cool down and control your breathing. This is the purpose of Blowing in Firm. While a mechanically simple pose, performing it well after a tough class can be challenging. To perform this pose, you will need to:
- Start by kneeling. Place your bottom on your ankles and your thighs on top of your calves.
- Keep your spine straight and shoulders relaxed.
- Don’t breathe in. Only exhale, and pull your stomach in and out.
/VajrasanaThunderboltPose-008-fce1c561cbfa4311bc9174d950077fd1.jpg)
Summary
We hope that this article has given you some insight into what Bikram Yoga is and what the 26 Bikram Yoga poses are that make Bikram Yoga so famous.
As mentioned previously, Bikram is one of the most challenging forms of Yoga and will push your body and mind to their limits. Even so, it comes with many benefits if you can push through the challenges.
If you have any experience with Bikram Yoga poses or tips, feel free to share them in the comments below.