If you’re looking for a way to improve your yoga practice, using a yoga bolster can be a great option. A yoga bolster is a cushion that helps you to achieve deeper stretches and poses.
In this article, we will provide a step-by-step guide on how to use a yoga bolster. We’ll also discuss some of the benefits of using a yoga bolster and much more, so make sure to read until the end.
What Is A Yoga Bolster?
A yoga bolster is a small, thick cushion that is used to support the body during yoga practice. Usually made from firm, supportive materials such as foam or cotton, a yoga bolster can help to provide stability and comfort during any number of yoga poses.

For example, a bolster can be placed under the knees in order to relieve pressure on the lower back during a supine pose. Or, it can be placed under the arms in a supported backbend to help open up the chest and shoulders.
Ultimately, the use of a yoga bolster can help yogis of all levels to more comfortably and safely enjoy their practice.
How to Use a Yoga Bolster in Different Yoga Poses
The first step is to determine which yoga poses would be improved by the use of a yoga bolster. For this reason, if you’re new to using a yoga bolster, you’ll want to check the following poses.
Balancing Core Work
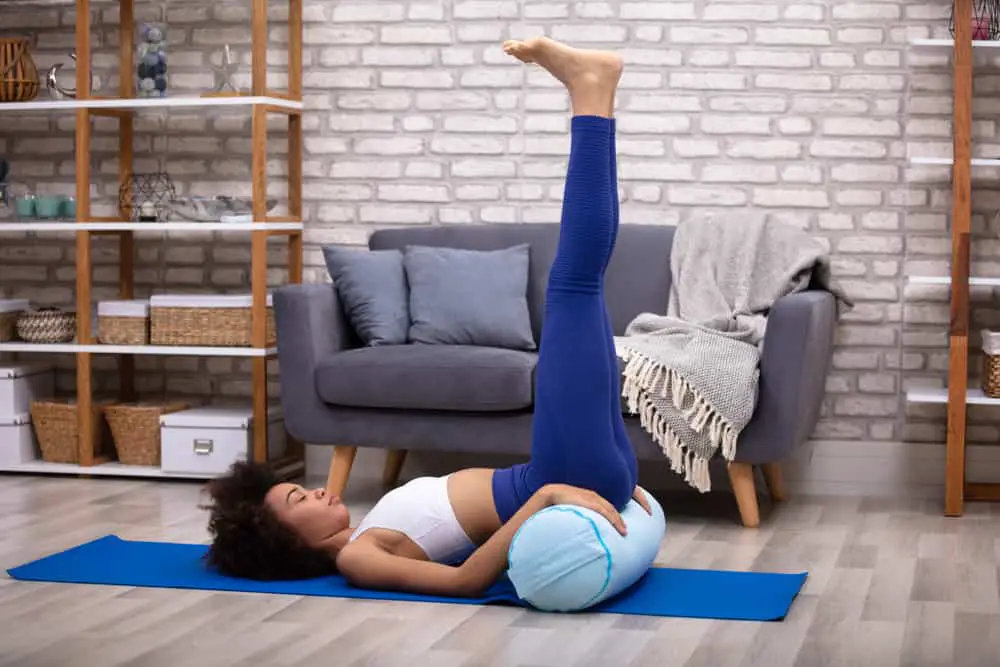
The Balancing Core Work yoga pose is one of the most challenging and daunting poses for beginner yogis. However, once you master this pose, it can provide a great workout for your core muscles, primarily if you use a yoga bolster.
In order to properly execute the Balancing Core Work yoga pose, start by lying on your back with your knees bent and your feet flat on the bolster. Place your hands on your hips and press your lower back into the ground. Next, lift your right leg off of the ground and extend it straight up towards the ceiling.
At the same time, lift your left leg off of the ground and bring it up to meet your right leg in the air. Once both legs are in the air, use your abs to scissor them back and forth, keeping them as straight as possible.
As you become more comfortable with the pose, you can increase the speed of your scissor kicks. Remember to breathe deeply throughout the entire pose.

Lord of the Dance Pose (Natarajasana)
The Lord of the Dance Pose is a beginner’s yoga pose that stretches the shoulders, chest, and legs while strengthening the back and core muscles. It also helps to improve balance and coordination.
To enter the pose, stand on the bolster with your feet together and your hands on your hips. Then, bend your right knee and take hold of your right ankle with your right hand. Lift your right foot and place it squarely on your left thigh.
If you feel stable, lift your left hand into the air. Reach up through your fingers and lengthen your spine. Gaze up at your left hand as you continue to breathe deeply. To exit the pose, release your right ankle and slowly lower your right foot to the bolster or the ground.

Warrior III (Virabhadrasana III)
Warrior III is a challenging yoga pose that requires both strength and balance. That being said, it is possible to perform it with a yoga bolster.
To enter Warrior III, begin in the Mountain Pose. From there, shift your weight onto one leg and raise the other leg behind you, keeping your hips level. Reach your arms out in front of you, parallel to the ground, and gaze forward, placing the bolster on your back.
Hold for several breaths once you are in the Warrior III Pose before returning to Tadasana. While Warrior III may seem daunting at first, it is a great pose for building strength and improving balance.

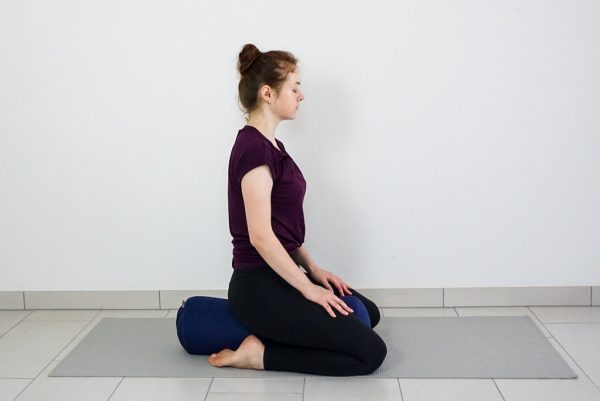
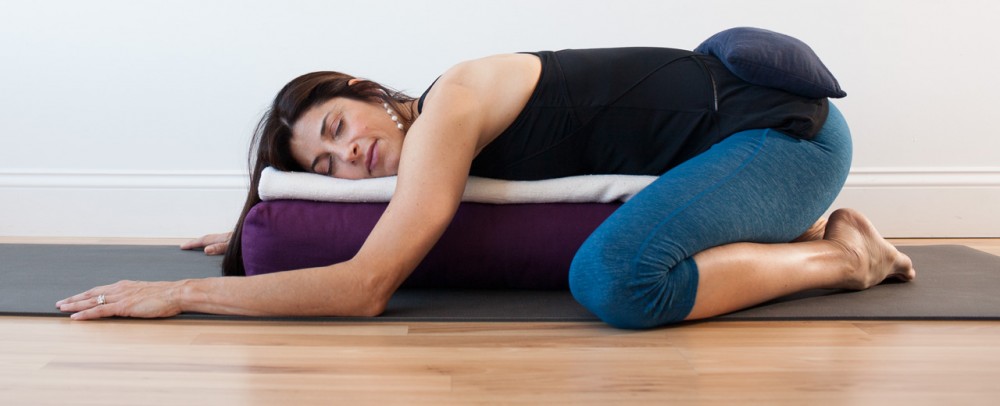
Bolster Hero Pose (Virasana)
The bolster hero pose is a restorative yoga pose that can be beneficial for both the mind and body. It is a gentle, supported backbend that helps to open the chest and shoulders while lengthening the spine.
To begin, sit on the edge of a bolster or pillow with your legs extended in front of you. Lean back, support yourself with your arms, and allow your upper body to relax onto the bolster.
You can stay in this position for as long as you like, inhaling and exhaling slowly. To release, carefully roll to one side and press up into a seated position. With practice, you will be able to sink deeper into the pose and experience its full benefits.
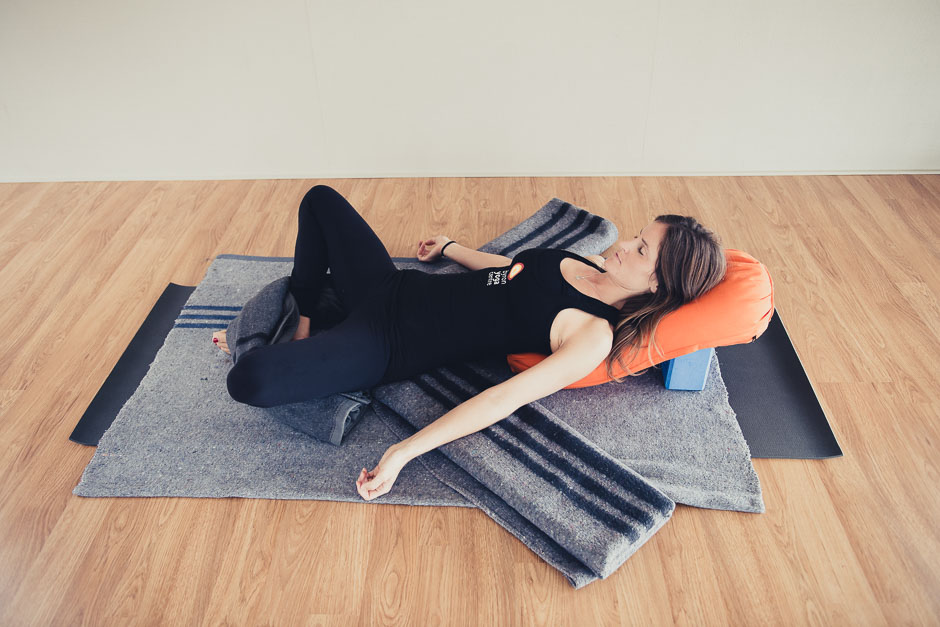
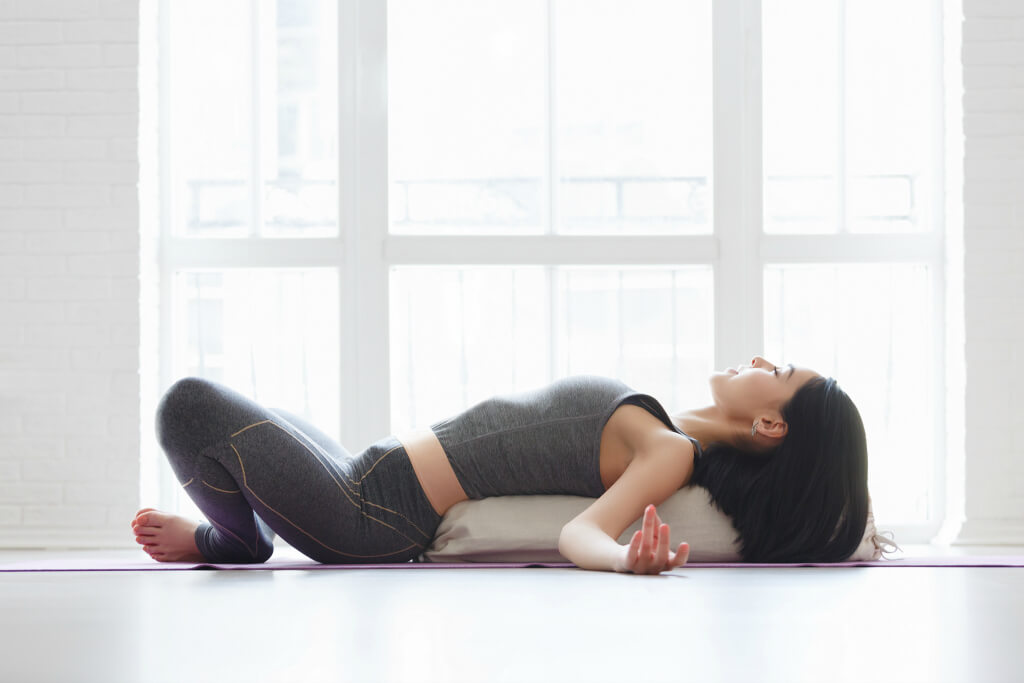
Supta Baddha Konasana
The Supta Baddha Konasana is a pose that offers several benefits. First, it helps to open the hips and inner thighs, which can be beneficial for those who sit for long periods or who have tightness in these areas.
Second, it helps to ease lower back pain by calming the nervous system and releasing tension in the spine. Moreover, it promotes relaxation and provides a sense of grounding.
To enter the pose, begin by sitting on a yoga mat with your legs outstretched in front of you. Next, bend your knees and bring your feet together. Then, allow your knees to fall open to the sides as you lean back onto your forearms.
If you need more support, you can place a bolster under your back. Press into your hands and slowly sit up straight to exit the pose.
Supported Pigeon Pose (Kapotasana)
Kapotasana, or Supported Pigeon Pose, is a restorative yoga pose that offers a variety of advantages, such as opening up the hips and releasing tension in the lower back.
To practice Kapotasana, start by sitting up tall on your mat with your legs extended. Next, bend your right knee and place your right ankle on top of your left thigh.
Once you are in position, place your hands on the bolster and relax into the pose. Then, slowly lean forward, draping your torso over your left leg. You can stay in this pose for as long as you like, but be sure to practice on both sides before coming out of the pose.
With regular practice, a Supported Pigeon Pose will help to increase flexibility and reduce pain in the lower back and hips.

Wide Angle Seated Forward Bend (Upavistha Konasana)
Upavistha Konasana is another pose that can be performed with a yoga bolster. To enter the Upavistha Konasana pose, begin seated on the bolster with your legs extended straight in front of you.
Then, slowly bend your knees and bring your heels toward your groin. Next, place your hands on the ground beside you and press down into your palms to lift your hips off the ground.
Finally, walk your hands out in front of you and lower your forehead to the ground, placing it on the other end of the bolster. Hold this position for as long as you feel comfortable.
Supported Fish Pose (Matsyasana)
The Matsyasana pose helps lengthen and release the muscles of the back and neck. In addition, it can help to improve posture and alignment.
To practice the Matsyasana pose, begin by lying on your back on a yoga bolster, keeping your knees bent and your feet flat. Then, put your hands below your hips with the palms facing down.
Next, slowly lift your chest and head off the floor, using your bolster for support. Hold this position for several deep breaths before releasing back down to the mat. Practicing this pose regularly can help you experience all of its benefits.

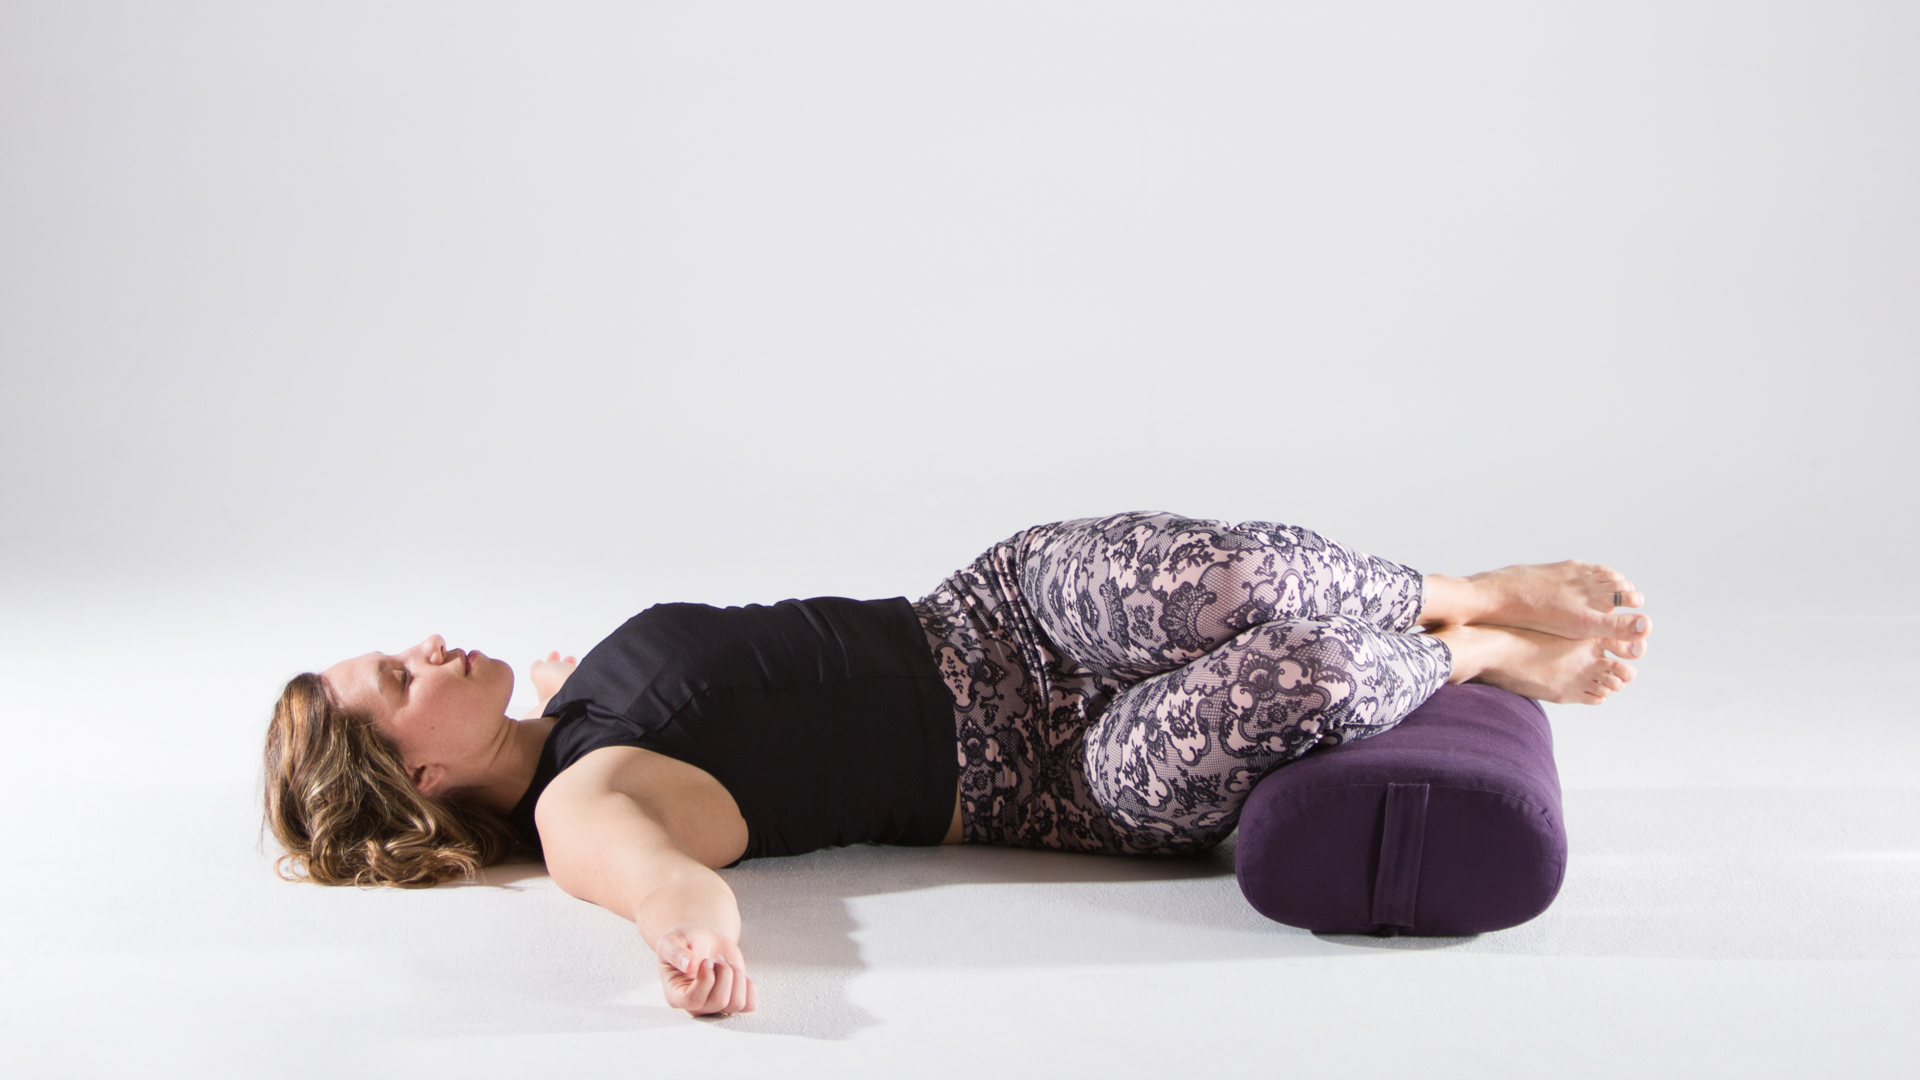
Legs Up the Wall Pose
The Legs Up the Wall yoga pose is a famous restorative pose that can be used to relieve stress and tension. The pose involves lying on your back, placing a yoga bolster underneath, with your legs up against a wall.
The goal of the pose is to relax the entire body and release any tension that may be held in the muscles. Your pelvis should be tilted to support your hips and lower back. You can place your hands on your stomach or chest, or you can allow them to rest by your sides.

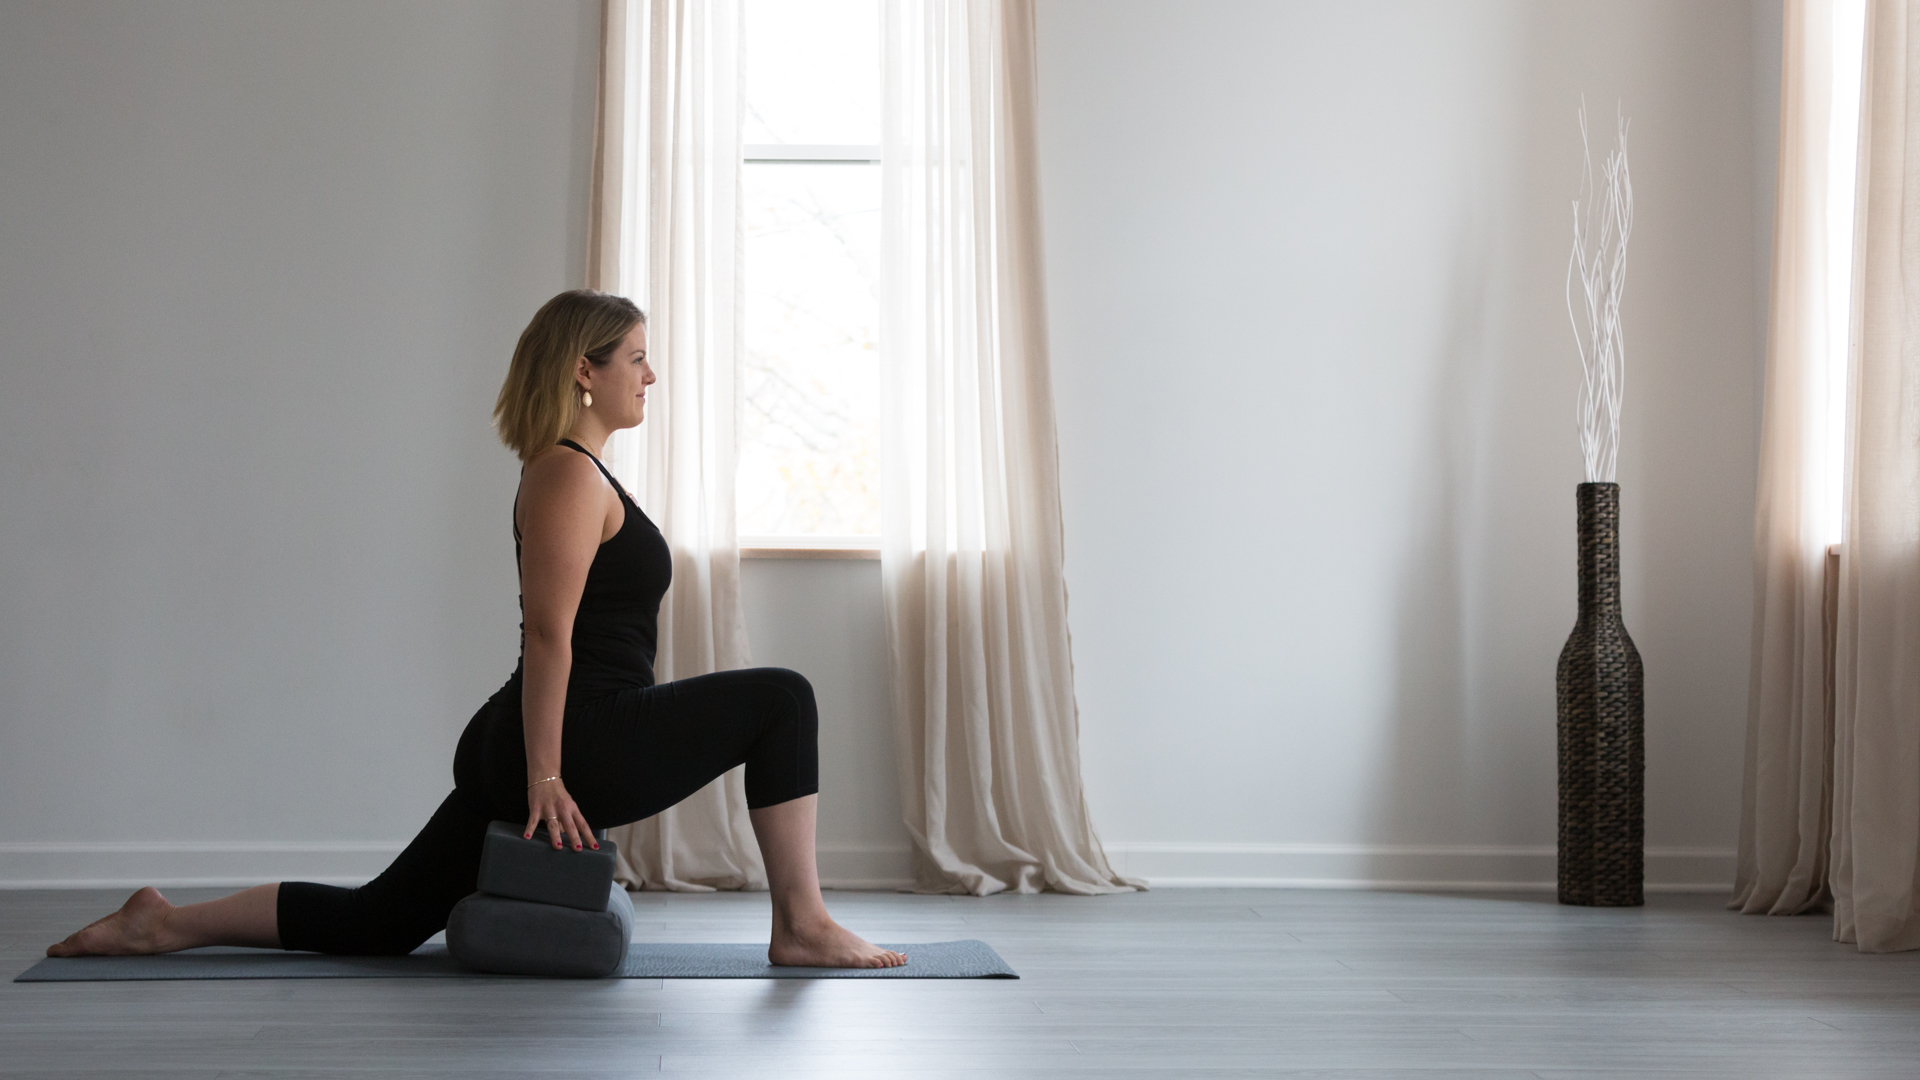
Low Lunge with Bolster (Anjaneyasana)
Low Lunge with Bolster is a restorative yoga pose that helps to lengthen the spine and hips. It is also an excellent way to release tension in the lower back and stress. To begin, place a bolster or pillows horizontally across your mat.
Then, step your right foot forward, keeping your left leg straight behind you. Inhale as you sink down into a low lunge, bringing your hands to your right knee. Make sure that your front knee is directly over your ankle and that your back leg is straight.
If you need more support, place your hands on either side of the bolster and press down into your palms. You can simply rest and allow your body to relax into the pose. Alternatively, you may want to inhale and lift your torso up, lengthening through the spine. Exhale as you release back down into the low lunge.
To release from the pose, inhale as you press into your feet and lift your hips up to return to standing.
Supported Knee Twist
The Supported Knee Twist is a restorative yoga pose that can help to release tension in the lower back, hips, and legs. To start, lie on your back with both knees bent and your feet flat on the ground. Place a yoga bolster under your right knee, then slowly allow your right leg to fall to the left, keeping your left foot flat on the ground.
Breathe deeply and hold the pose for several minutes before repeating it on the other side. The Supported Knee Twist can be a helpful way to relieve pain and stiffness in the lower body, and it can also be used as a gentle stretch for tight muscles.
When performed regularly, this pose can help to improve flexibility and range of motion in the hips and legs.
Supported Child’s Pose
One of the most restorative yoga poses is the Supported Child’s Pose, which is often used as a counterpose after more active sequences. This pose can be done with a variety of props, including bolsters.
Start on Child’s Pose on your mat with your knees hip-width apart and your forehead resting on the mat. Then, place a bolster under your hips, and rest your head on a block or another bolster. You can also place a blanket over your back for additional support. Stay in this pose for as long as you like, letting your body totally relax.
Supported Child’s Pose is an excellent way to release tension from the spine and low back and lengthen the muscles of the front body. It’s also a great way to wind down before bedtime.
Supported Backbend
A backbend is any yoga pose in which the spine moves away from its natural position of alignment.
When practicing a supported backbend, keeping the following things in mind is important. First, the bolster should be positioned so that it offers stability without impeding the movement of the spine. Second, the breath should be slow and steady, with the exhale coming slightly longer than the inhale.
Finally, it is important to listen to your body and only go as far as you feel comfortable. With these guidelines in mind, supported backbends can be a safe and satisfying way to open up the chest and heart.
Wide-Legged Forward Bend
The wide-legged forward bend is a yoga pose that offers many benefits and is performed in a similar way as Upavistha Konasana.
To practice the Wide-Legged Forward Bend, begin by standing with your feet about four feet apart. If you have tight hamstrings, you may want to place your hands on a block or a chair for support.
From here, inhale deeply and then exhale as you fold forward from the hips. Allow your arms to hang down towards the floor. Remember to keep your back flat and your core engaged.
Extended Tips on How To Use Yoga Bolster
A yoga bolster is a firm, rectangular cushion often used in restorative yoga. While yoga bolsters are not essential for every practice, they can be helpful for beginners or those with injuries. Here are a few tips for taking care of your yoga bolster:
- To extend the life of your bolster, avoid placing it in direct sunlight or exposing it to extreme temperatures.
- Remove the cover and wash it in the washing machine in cold water to clean your bolster.
- While it’s in the washer, plump the cushion up and its stuffing. Also, push the stuffing down in order to remain stiff.
- After washing the cover, allow it to air dry completely before using it again.
Your yoga bolster can provide years of support and comfort with proper care. By following these simple guidelines, you can ensure that your investment will last for many practices.
Conclusion
Yoga bolsters are a great way to deepen your practice and make it more comfortable. In this article, we’ve outlined how to use a yoga bolster so you can get the most out of your practice.
If you have any questions or want some tips on how to use a yoga bolster for certain poses and the best yoga bolster for the recommendation, let us know in the comments below, and keep practicing with your bolster to become a real master!