Legs up the wall pose, also known as Viparita Karani, is one of the most relaxing poses in all forms of Yoga. As well as the relaxation present in the pose, it is also a pose with many variations. Even though this pose may seem simple at first, you could spend years practicing just Viparita Karani and its variations without getting bored.
However, given the surprising depth of this pose, it can be difficult to know where to start. That is what we will discuss in this article.
The History of the Legs Up the Wall Pose
The Legs Up the Wall Pose is a relatively recent addition to many yogic systems, at least compared to how old the art itself is. This pose was first referenced in the 13th century, in a document known as the Vivekamārtaṇḍa.
However, the pose was added to many yoga practices during the 17th century as Hatha Yoga began to increase in popularity. Finally, this pose was imported to Western countries as a form of exercise during the mid-20th century. Since then, the Legs Up the Wall Pose has exploded in popularity due to its relative simplicity and widely reported health benefits.
The Benefits of Legs Up the Wall Pose
Viparita Karani is well known for its many health benefits. While some of the original practitioner’s promises of miracles, such as immortality and a loss of gray hairs, have not panned out, this pose is still extremely beneficial. Just some of the many benefits of the Viparita Karani include:
- Reduced Anxiety. Many Yoga practitioners claim that this pose is one of the most relaxing, and for good reason. In this pose, you activate your wandering nerve. By doing so, you send a signal to your body that it is safe to start to relax, making this a fantastic pose for alleviating anxiety.
- Less Leg Strain. If you stand or walk a lot during your day, you may suffer from leg strain. Even a minor amount can be uncomfortable and reduce your quality of life. However, the Legs Up the Wall pose is fantastic for alleviating this strain. By resting your legs on a wall or other surface, they won’t have to carry your weight giving them the time they need to relax and recover.
- Improved Sleep. The Legs Up the Wall pose is one of the most relaxing and restorative poses in Yoga, making it a great addition to your nightly routine if you struggle to get to sleep. By raising your legs above your heart and breathing deeply, you can lower your heart rate, making it easier to fall asleep.
- Better Circulation. If you struggle with excess fluid in your legs, then Viparita Karani might be what you need. By raising your legs above your head, you can take some pressure off your heart by improving circulation.

Precautions & Contraindications for Beginners to Do Legs Up the Wall Pose
As you can see, Viparita Karani has many fantastic benefits, even for new Yoga practitioners. However, there are a few precautions you should keep in mind if you are new to Yoga.
Whilst most Yoga poses are incredibly safe, you should always consult with your physician before starting any new physical activity. However, you should avoid the Legs Up the Wall pose if you have glaucoma, high blood pressure, or hypertension.
Even if you do not have any of these or similar conditions, you should still keep a few things in mind when performing this pose:
- If you hold this position for an extended period, you may start to lose feeling in your legs. This feeling is caused by a lack of circulation. If this happens to you, you can slowly leave the pose by bending your knees to your chest before moving to a kneeling position. You can also simply shake your legs to get the blood flowing into them again.
- You should not feel any pain in your back or neck when performing this pose. If you feel some pain, slowly leave the pose and give your body a chance to recover.
- Many Yogis also caution against doing this pose if you are at the height of your menstrual cycle. They believe you should avoid inversions, like Viparita Karani, while on your period as it is believed they increase the risk of endometriosis. However, this idea is controversial, so it is best to discuss it with your doctor and instructor.
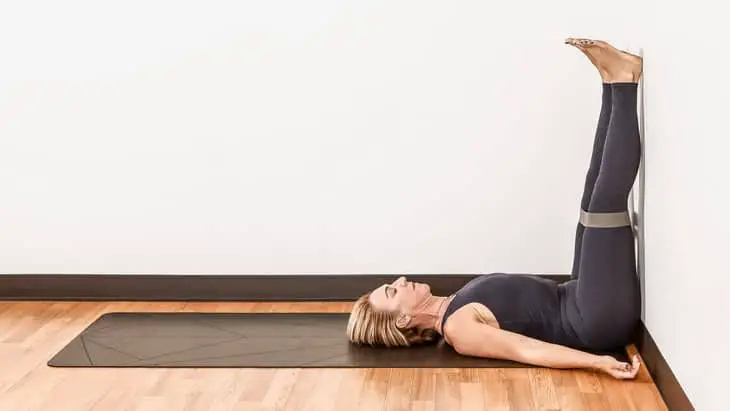
How To Do Legs Up the Wall Pose
As mentioned previously, Legs Up the Wall is one of the easier inversions to perform. There are a few steps involved in this pose:
- Start on the floor in a seated position. Face the wall you want to lean on before rolling onto your back. Make sure to keep your feet underneath your hips.
- Push your feet up and your tailbone towards the wall.
- Rest your arms next to your body. Allow every part of your body to rest and hold this position for between 5 and 10 minutes.
Here is a video of the Legs Up the Wall pose in action.
10 Legs Up the Wall Pose Variations
1: Legs Up the Wall Pose with support
The most basic variation of the Legs Up the Wall pose involves you placing either a cushion or rolled-up towel beneath your lower back. The main benefit of this pose is that it allows you to stretch out your core and spine. The steps in this pose are:
- Start by kneeling in front of your wall.
- Place your support right next to the wall. This can be a rolled-up yoga mat, a towel, or something similar.
- Enter Legs up the Wall Pose.
This variant is easier to perform and gives your core and extra stretch. When starting this pose, make sure to plant your upper body into the ground and the support so you don’t lose your balance.

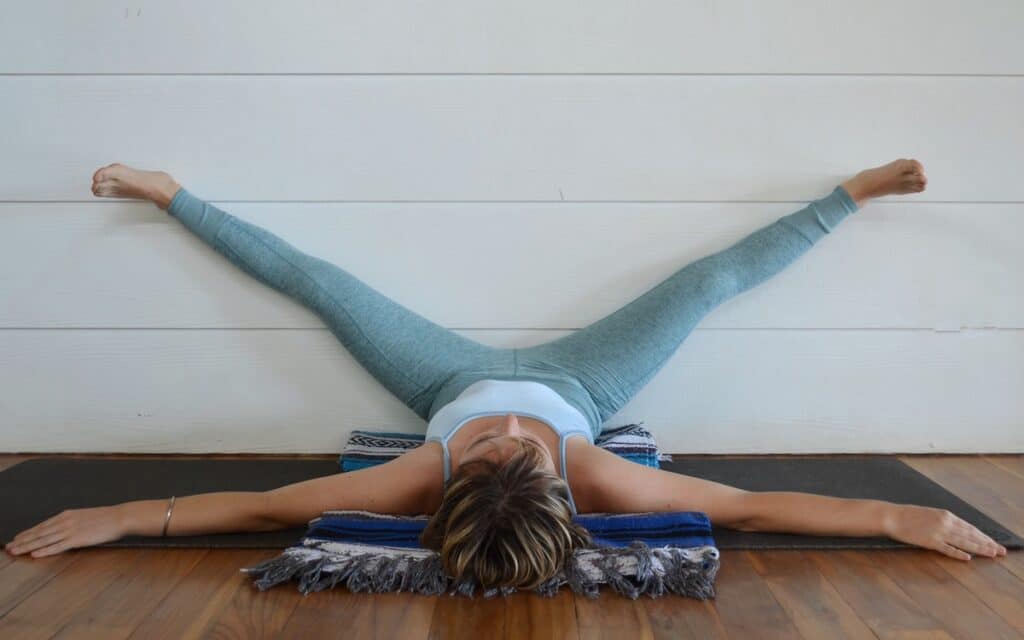
2: Legs Up the Wall Pose with spread legs
Another relatively simple variation of the Legs Up the Wall pose. This pose allows you to extend your hamstring and groin more than in a traditional Viparita Karani pose. To do this pose, you need to:
- Start next to the wall and enter Legs up the Wall pose.
- Once you are in the pose and stable, push out your legs until they form a V shape.
This variant can be a little tricky balance-wise since your legs are far away from your center of gravity. If you are starting out, the V shape does not have to be too wide – just wide enough to give you a stretch while maintaining your balance.
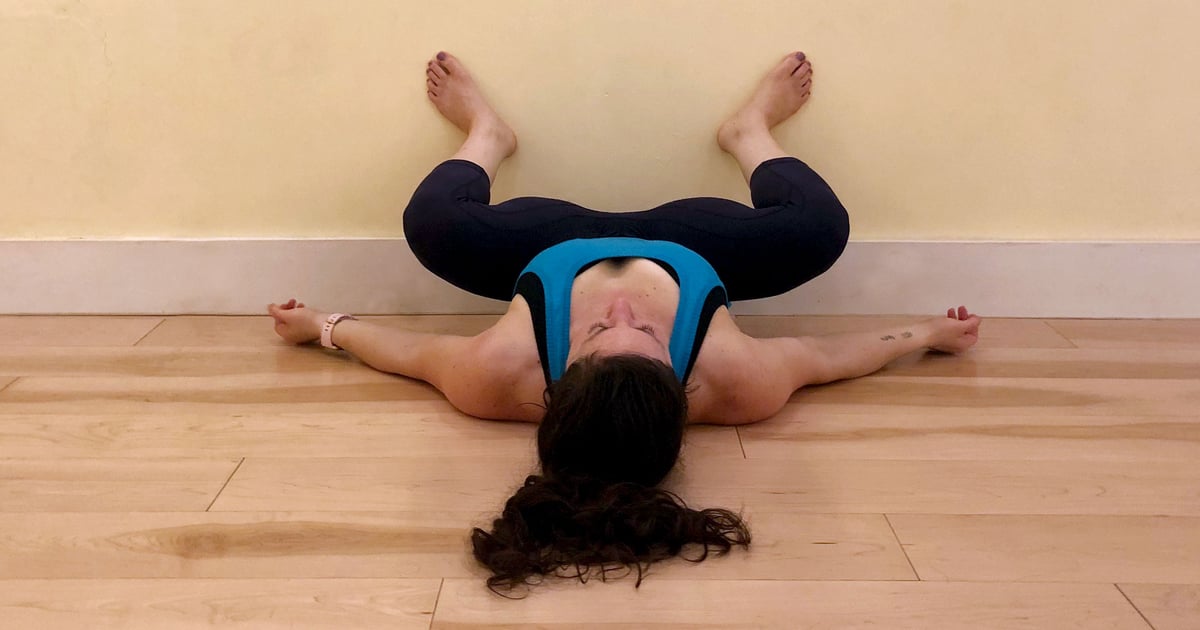
3: Legs Up the Wall Pose with bent legs
This variant of Viparita Karani is an excellent way to stretch your inner thighs. This pose is also a fantastic way to develop the muscles in your hips, lower back, and knees. The steps involved in this pose include:
- Enter the traditional Legs Up the Wall pose.
- Bring your feet to close together.
- Bend your legs at the knees, pushing the bottom of your feet together.
If you are a beginner you don’t need to bring your feet close to your pelvis. As you develop your flexibility, this pose will become easier.

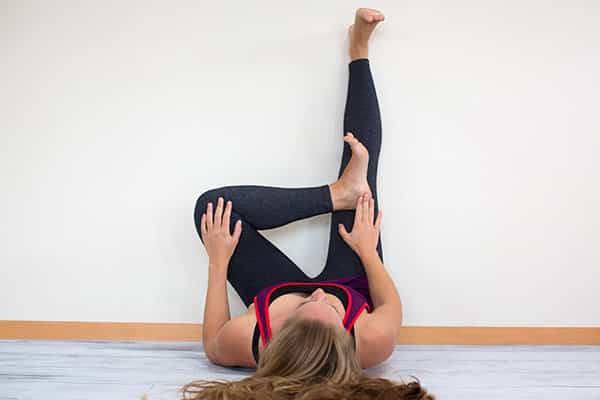
4: Legs Up the Wall Pose with a crossed leg
Also known as the Eye of the Needle pose, this variant of the Legs Up the Wall pose is great for your flexibility, especially in your hamstrings, pelvis, and knees. If you want to try out this pose, the steps involved are:
- Enter the Legs Up the Wall pose.
- Bend your right knee and fold your right leg over your left.

5: Legs Up the Wall Pose Asymmetrical
This pose is near identical to the traditional Legs Up the Wall pose. However, instead of having both legs up straight on the wall, you pull one of your legs towards you while keeping it straight. There are a few advantages to this variation. Firstly, it provides a deeper stretch to your hamstrings. Secondly, it builds up the muscles in your abdomen as they have to remain engaged. The steps to this pose are:
- Start in the Legs Up the Wall pose.
- Inhale and exhale. As you do so, pull your left leg towards your chest. Make sure to keep your leg straight.
- Hold this position for five to ten breaths. Switch sides to stretch out your other leg.
One tip for performing this pose; if you have tight hamstrings, use props, such as a rolled-up mat, to ease into this pose.
6: Half Happy Baby Pose on a Wall
The Half Happy Baby Pose on a wall is similar to the Asymmetrical Leg Up the Wall pose. However, instead of holding your leg up, you bend your knee and pull it towards your chest. This pose is one of the best ways to stretch your glutes and build up the muscles in your legs. There are a few steps involved in doing this pose:
- Begin in the Legs Up the Wall pose.
- Bend your left leg.
- Pull it towards your chest and grab on to your foot.
- Hold this position for at least five breaths and repeat on the other side.
The goal of this pose is to form an L with the bent leg. Make sure to keep your non-bent leg pressed into the wall.

7: Sleeping Pidgeon Pose Wall
The Sleeping Pigeon pose is, as you can guess, an awesome pose if you want to relax. This pose is a good way to improve the flexibility in your hip flexors and pelvis. To do this pose, you need to:
- Start kneeling next to the wall.
- Press one leg into the wall, forming an L with this leg by keeping your leg bent.
- Put one foot on your other knee.
- You can either rest your arms next to you or behind your head. Hold this position for a few deep breaths.
- Repeat this pose on the opposite side.
The bent leg is extremely important for this pose. Make sure to press it into the wall so it does not wobble.
8: Wall Squat Pose
The Wall Squat pose is an excellent pose for developing your thighs and knees. This pose is also a great way to stretch your chest muscles and keep your spine aligned. To perform this pose, you need to:
- Start in the Legs Up the Wall pose.
- Bend your knees and bring them down the wall.
- Your goal is to keep your feet flat on the wall and your back straight.
- Hold this position for around ten breaths.
This pose can be tough if you have not developed your leg strength. Make sure to slowly deepen this pose. Doing so will help you develop the strength needed for this and other Yoga poses.
9: Supine Feet Resting on Wall
This pose is an excellent addition to a Yoga Flow routine that starts with the Legs Up the Wall pose. This pose, while simple, is a good way to improve the muscles in your knees and spine. This pose involves the following steps:
- Begin in the Legs Up the Wall pose.
- Make sure to keep your legs and feet beneath your hips.
- Bend your knees. Press your feet gently into the wall.
- Hold this position for between five and ten breaths.

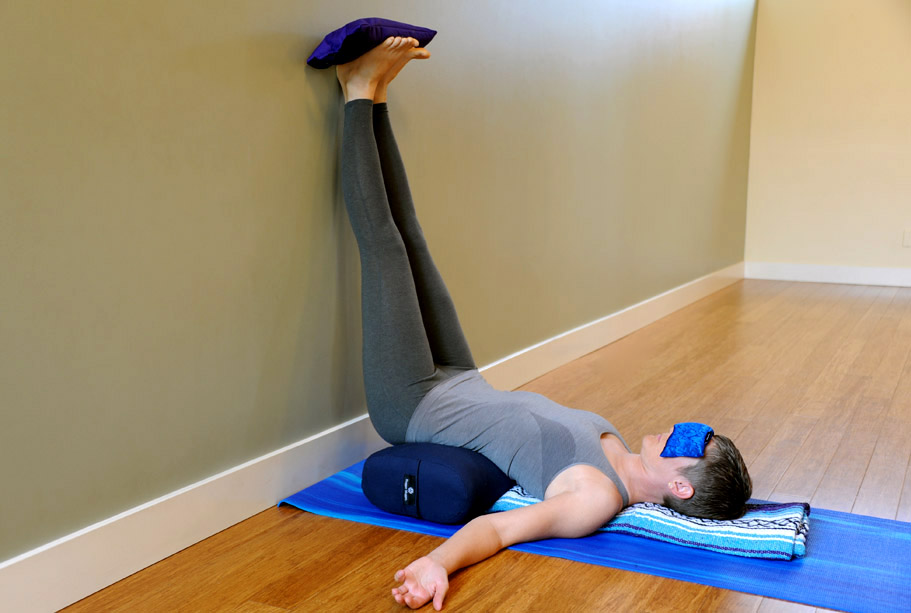
10: Legs Up the Wall Pose with the sandbag
If you want to challenge yourself, then adding a sandbag to the Legs Up the Wall pose can be a great way to develop your leg strength. This pose is also not difficult to perform. The steps of this pose are:
- Face the wall you want to lean on. Push your feet up and your tailbone towards the wall.
- Bend your knees slightly and place the sandbag on or between your feet.
- Straighten your legs and hold this position for at least five breaths.
You should try out this pose once you have some skill with the traditional Legs Up the Wall pose. To continually improve this pose, you can add progressively heavier sandbags. Doing so will greatly improve your leg strength.huggermugger
Conclusion
We hope that we have given you some insight into the Legs Up the Wall pose. This pose comes with many benefits, including reduced stress levels and leg strain. There are also many varieties of Viparita Karani, including less and more difficult variants, meaning this pose is perfect for all skill levels.
If you know of any other variations or other benefits to the Legs Up the Wall pose, please let us know in the comments section below.