Starting yoga is an exciting experience. You will learn to use your body in unique ways, learn a lot, and improve your flexibility, strength, and general wellbeing. However, many yoga poses look incredibly complicated, especially if you are just starting.
We are here to help clear up these complexities. In this article, we will discuss 20 common yoga poses for beginners. Practicing these easy yoga poses is a great way to prepare for your first yoga class or your personal practice.
1: Crescent Lunge
This is an excellent pose for improving your yoga practice. There are several benefits to the Crescent Lunge. By doing this pose, you improve your balance and strengthen the supporting muscles around your knees. To do this pose, you need to:
- With your left foot, expand your stance by pushing your left foot ahead of you. Your feet should almost be mat-length apart.
- Lower your stance by pushing your left knee over your foot. You want your thigh to be parallel with the mat, your hips squared forward, and your right leg to be unbent.
- Stretch your hands above your head.
- Hold this position for five breaths before switching sides.
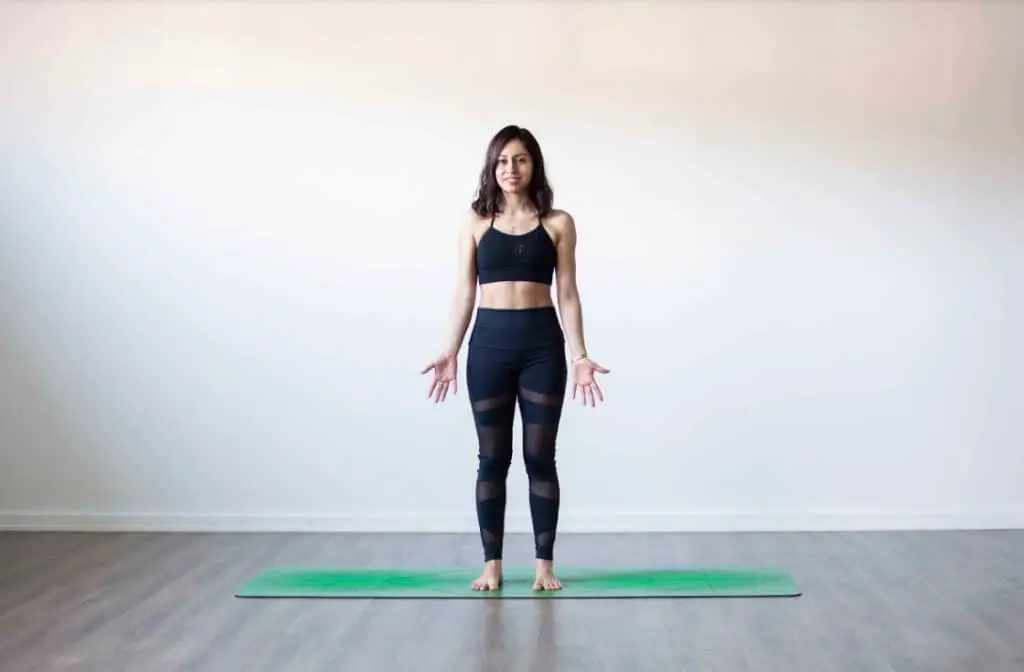
2: Mountain Pose
The Mountain pose is one of the best poses for new practitioners. This pose strengthens all the muscles in your legs, especially your thighs. Mountain pose is relatively simple:
- Stand with your toes touching and your heels apart.
- Spread your toes so that your weight is evenly distributed throughout your feet.
- Activate your core muscles and keep your hips under your center of gravity.
- Raise your arms above your head and hold for between three and five breaths.
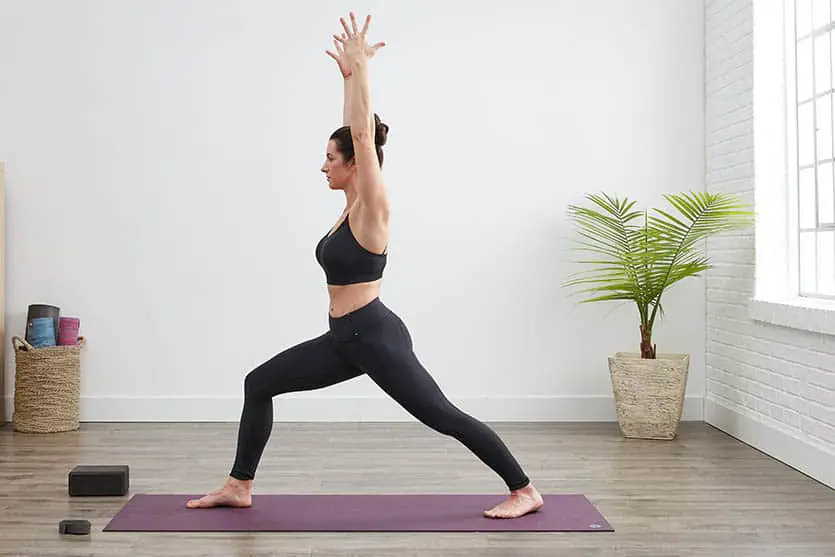
3: Warrior 1 Pose
Warrior 1 is one of the most powerful poses in Yoga, with roots in many martial arts. This pose is one of the best for improving your general health but especially develops your core and hip muscles. To perform Warrior 1, do the following:
- Start in the Mountain Pose before bringing your left foot back to the edge of your mat.
- Raise both arms over your head.
- Turn your left foot outwards until it points 90 degrees to the left.
- Make sure that your heels are perpendicular to each other before breathing in deeply three to five times.
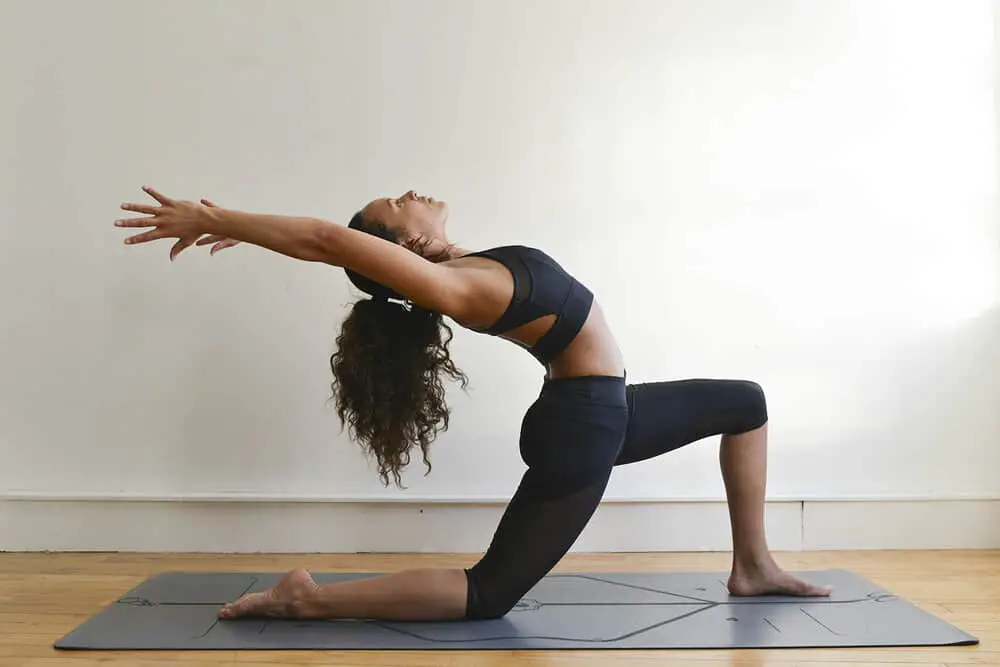
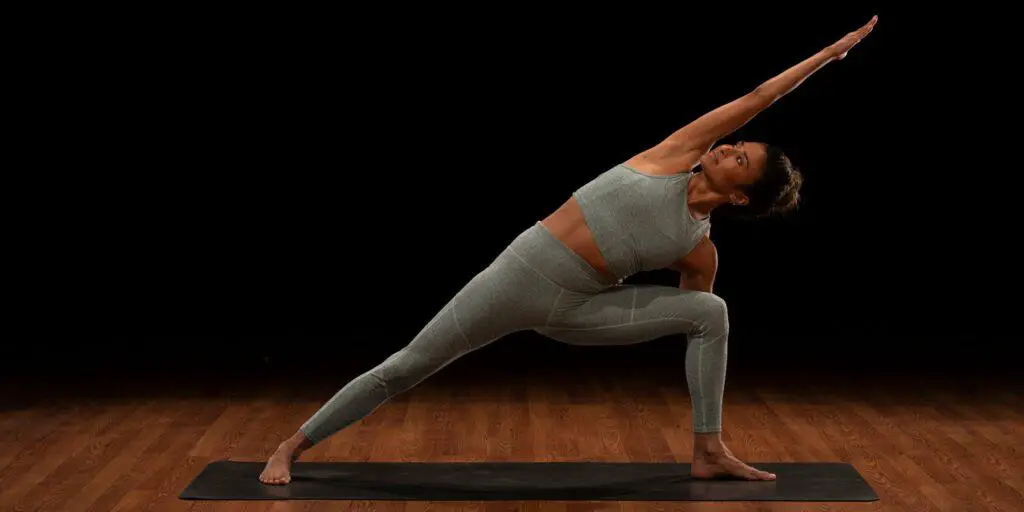
4: Extended Side Angle
If you are looking to give your entire body a good stretch, the Extended Side Angle Pose may be one of your best options. The ESA stretches everything from your shoulders all the way down to your ankles. You perform the ESA by:
- Move your left foot to the back of the mat while planting your right foot in place.
- Lift your arms before extending them horizontally. As you do this, rotate your left foot until it is parallel with the back of your mat.
- Bend your right knee until parallel with your mat.
- Lower your right forearm to your right thigh and extend your left arm over your ear.
- Look towards your left hand and breath deeply for a few breaths.
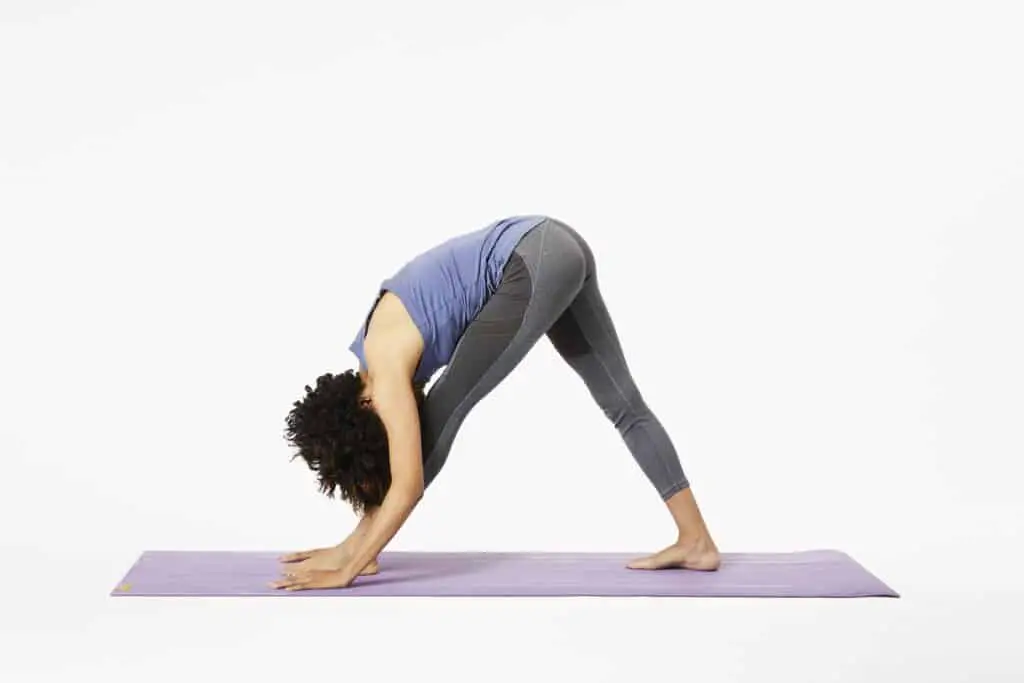
5: Pyramid Pose
The pyramid pose is one of the best for strengthening your legs. If you perform this pose consistently, you are guaranteed to notice great improvements in your flexibility. The steps for Pyramid Pose are:
- Begin in Mountain Pose. Place both your hands on your hips.
- Pull your right foot back. Line up both your heels with your right foot pointing out and to the right.
- Point your arms out to both sides as you inhale. As you exhale, bring both arms behind your back with palms touching.
- Inhale once more, engaging your quads.
- As you exhale, bend forward. The goal is to try and bring your belly button to your thigh.
6: Cow Pose
The Cow Face pose is deceptively challenging. However, if you want to release tension in your hips, the Cow Face pose may be one of your best options. The steps for this pose include:
- Start in Staff Pose, sitting down with your right leg over your left.
- Bend your left knee and bring your left foot to the outside of the opposite hip.
- Stretch out your spine.
- Take your right arm to your side as you inhale. When you exhale, bring your right arm behind your back by bending your elbow
- Inhale again, pointing your left arm to the ceiling. Bend your left elbow as you bring your left arm down your spine. The goal of this pose is to lock your left and right hands together behind your back.
- Repeat on the opposite side.
7: Warrior 2 Pose
Warrior 2 is an excellent pose for developing your resolve and balance, as you must hold yourself up in a somewhat uncomfortable position. The steps to this pose are similar to Warrior 1:
- Start in the Mountain Pose and point both of your arms outwards.
- Point your right foot to the front of the mat.
- Point your left foot towards the front and slightly to the left.
- Bend your right knee.
- Distribute your weight evenly between both legs by keeping your head above your pelvis.
- Stretch both your arms out and hold for at least five deep breaths.
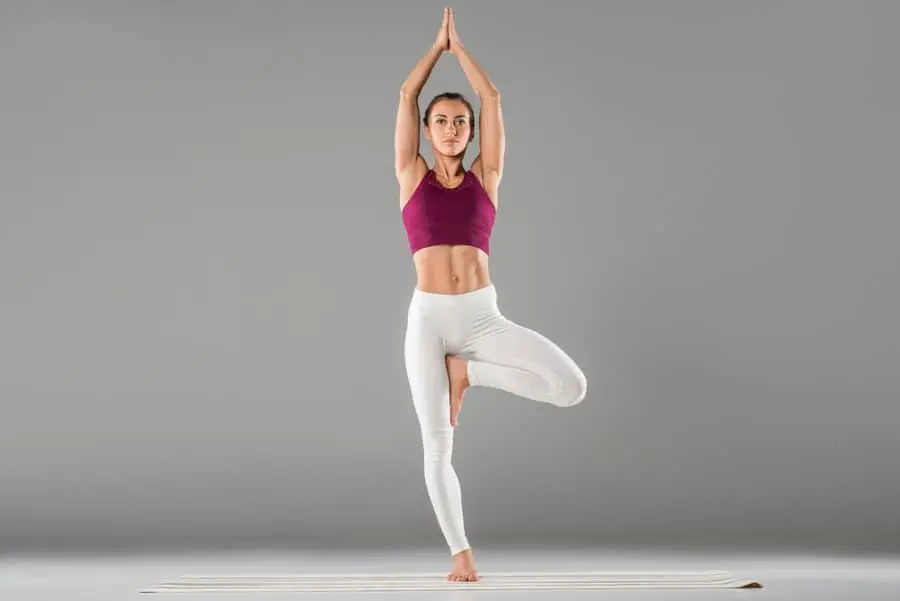
8: Tree Pose
The Tree pose is likely one of the first poses you will be introduced to when beginning your yoga practice. This pose is used frequently in standing yoga and is one of the best ways to improve your balance and concentration. You do the Tree Pose by:
- Start in the Mountain Pose.
- Slowly bring up your right foot to your left thigh. As you do so, point your right knee towards the ground.
- Clasp your hands together and lift them to your chest or head (personal preference).
- Hold for up to ten deep breaths before switching sides.
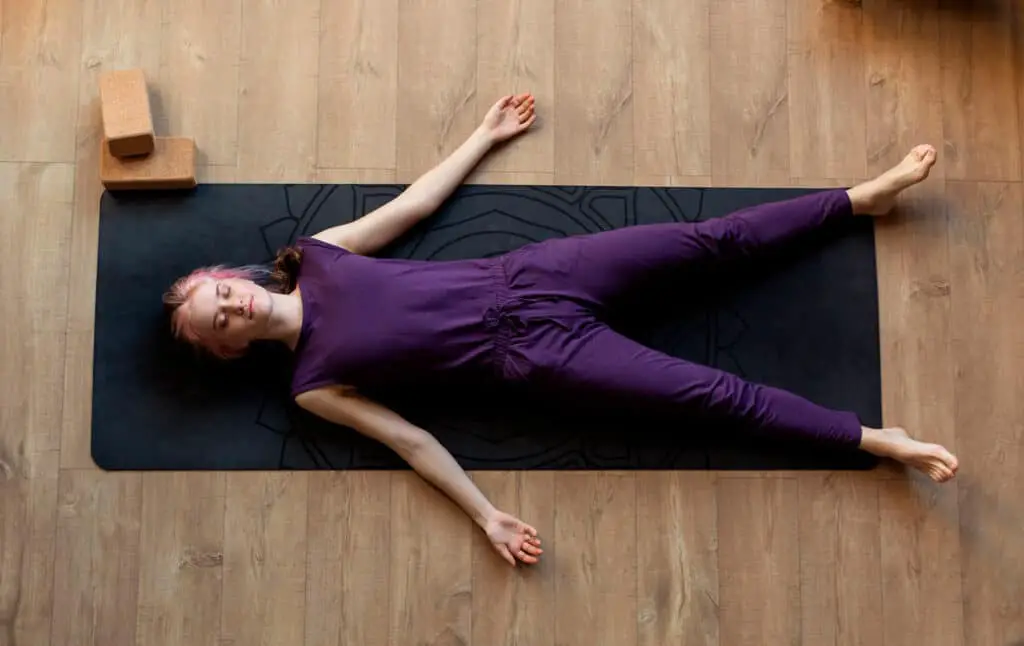
9: Corpse Pose
While this may be the least physically intensive yoga pose, the Corpse Pose is a fantastic way to relieve the stress following a tough class. Surprisingly enough, there are a few steps needed to perform this pose:
- Lay on your back. Let your hands and feet fall to the side.
- Relax every part of your body (your instructor will help guide you through this).
- Breath slowly, in through your nose and out through your mouth.
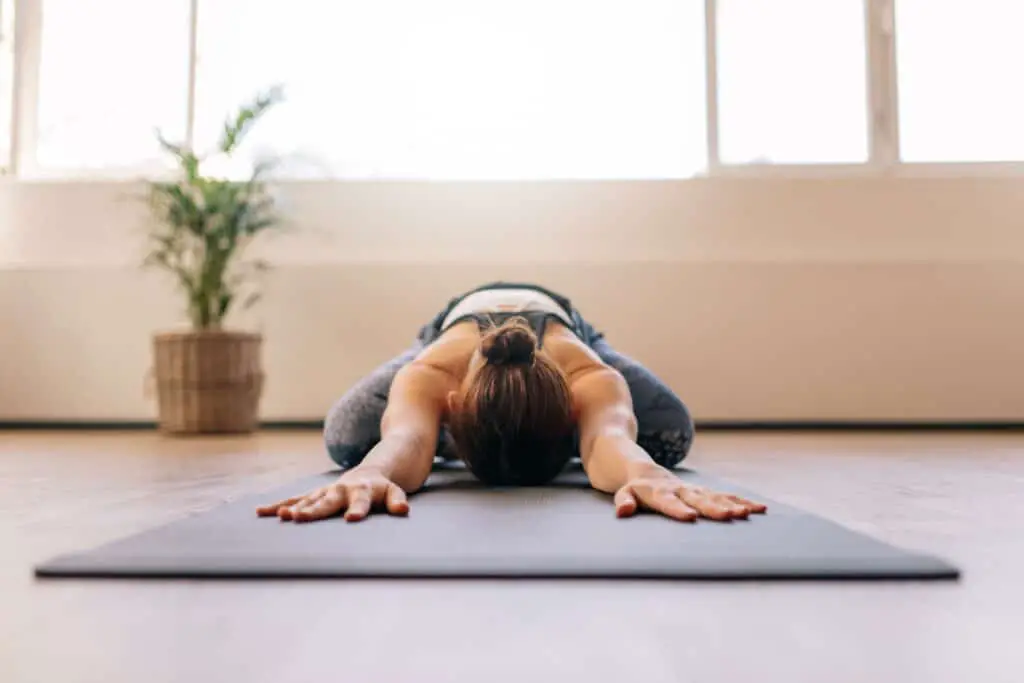
10: Child’s Pose
The Child’s Pose is a relaxing pose that is a great chance to reset in class. This pose gives you a chance to relax and clear your mind of any of the day’s troubles. To do this pose, you need to:
- Begin in a kneeling position with your feet beneath your thighs.
- Stretch your upper body downward, leading with your arms.
- Rest your stomach on your thighs and your head on the mat.
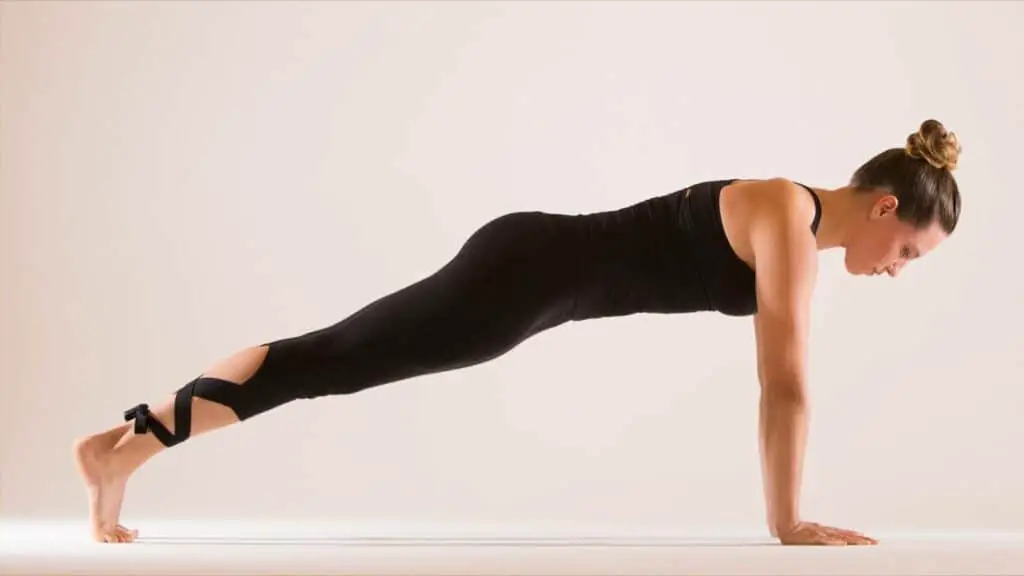
11: Plank Pose
The plank pose is one of the best poses for building up your arm, chest, and shoulder strength. This pose can be challenging but just take it one step at a time:
- Start on all fours, resting on your knees with your hands flat on the ground.
- Lift your knees and extend your legs into a plank position, a single long line.
- Breath in and out for between five and ten deep breaths.
12: Staff Pose
If you want to improve your posture, the Staff pose is a great place to start. This pose is also a great way to stretch out your hamstrings and develop your flexibility. There are a few steps needed for the Staff Pose:
- Sit down with your legs straight out in front of you.
- Straighten your arms and bring your hands next to your hips.
- Touch your toes but make sure your heels do not touch.
- Push your chest and collarbones out from your stomach.

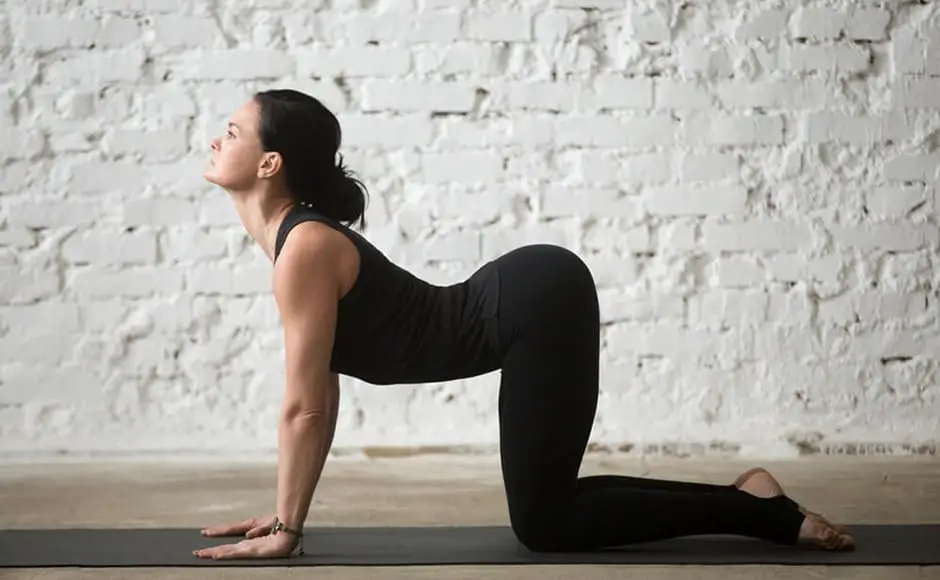
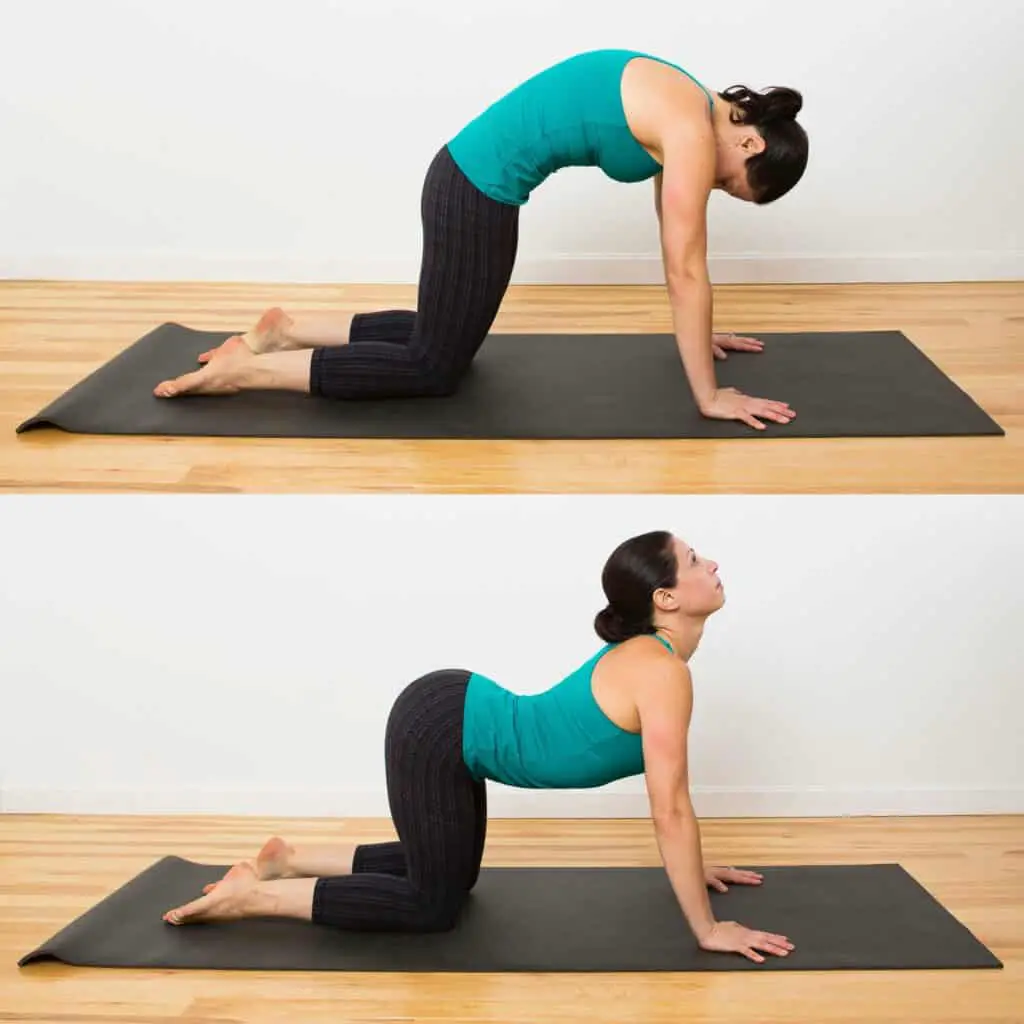
13: Cat/Cow Pose
Cat/Cow pose is one of the first poses you will learn in any yoga class and for good reason. Cat/Cow improves the circulation to your lower back and is also a great way to relieve stress. Here are the steps needed for the Cat/Cow Pose:
- Start on all fours, with your wrists below your shoulders and knees beneath your hips. Start with your spine in a straight line.
- Curl your toes and tilt your pelvis until your tailbone points up. Allow this movement to go up to your spine, moving your neck last.
- Drop your stomach down but draw your belly button inwards. Look upwards but make sure not to crank your neck. This is the cow pose.
- To enter the Cat pose, place the tops of your feet on the floor and tuck your tailbone in.
- Drop your head and push your belly button towards your spine.
- Repeat for five or ten breaths.
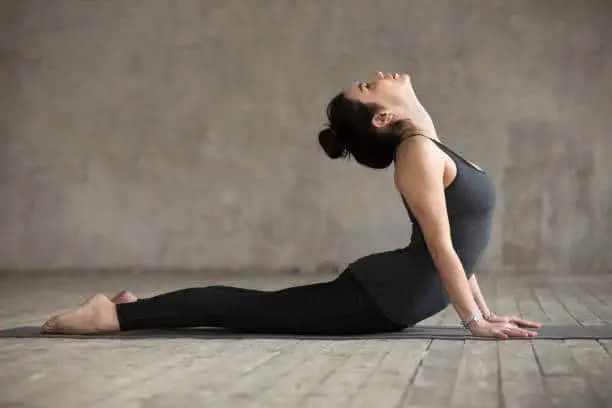
14: Cobra Pose
The cobra pose is one of the best poses for improving the flexibility of your spine. This pose is also great for relieving stress in your lower back and spine. There are a few steps in this pose:
- Start out on the flat of your stomach with your hands next to your ribs.
- Press all your toes into the floor and rotate your inner thighs up to the ceiling.
- Press your hands gently to the floor and lift your head and shoulders. Make sure to keep your shoulders relaxed.
15: Dancer’s Pose
While not one of the easiest poses, the Dancer’s prose is elegant and beautiful when performed well. This pose will improve your body awareness and strengthen many of your leg and hip muscles. If you wish to attempt this pose, perform the following steps:
- Begin in the Mountain Pose.
- Press down your big toes into the mat while arching your feet.
- Bend your right knee and bring it back to your right thigh. Try to keep your body as symmetrical as possible throughout these steps.
- Raise your opposite arm to your front. As you do so, slowly pull up your right leg and bend forward slightly, always keeping a solid base.
- Hold for between five and ten breaths before returning to mountain pose. Repeat on the opposite side.
If you want to see this pose done beautifully, watch this video.
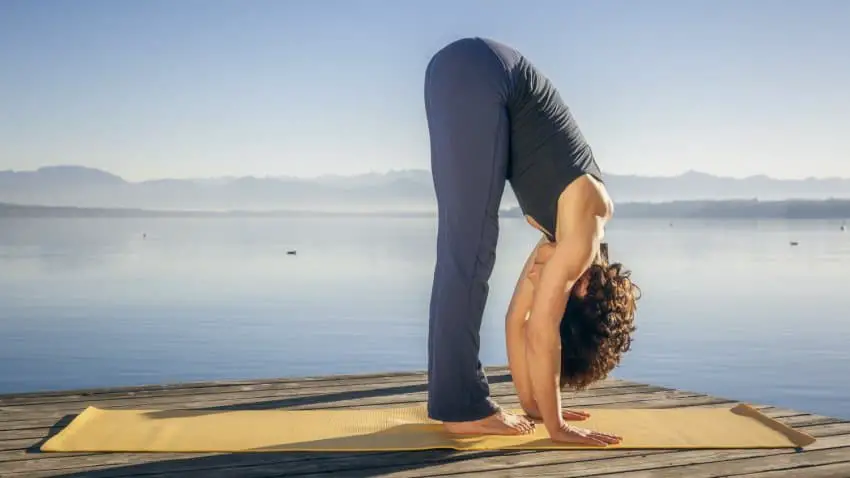
16: Standing Forward Bend
The Standing Forward Bend is a fantastic way to strengthen your thighs and knees, as well as give your whole body a good stretch. There are only a few steps to this pose:
- Begin in the Mountain Pose.
- Curve your knees so that they are neither straight up nor completely bent.
- As you do so, bend from your hips, bringing your torso to rest on your legs.
- Put your hands in front of or parallel to your feet.
- Exhale and extend your legs.
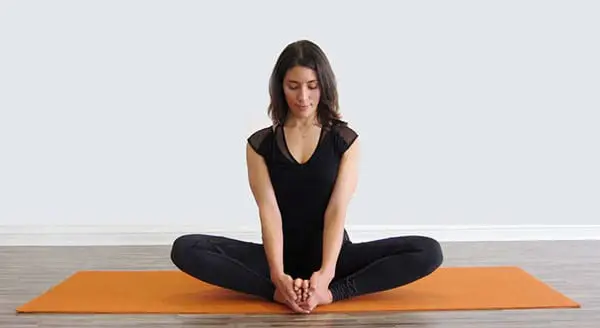
17: Cobbler’s Pose
Another vital pose for beginners to master, the Cobbler’s pose is one of the best ways to stretch out your groin and hip muscles. This pose, while physically challenging, only has a few steps:
- Start in Staff Pose. You want to flex your knees and push your feet inward towards your groin.
- As you do so, let your knees fall out to the side.
- With your arms, gently drag your feet towards your groin. Stop when you feel any discomfort.
- Press your feet into each other and sit up as straight as you can. Hold this position for a few deep breaths.
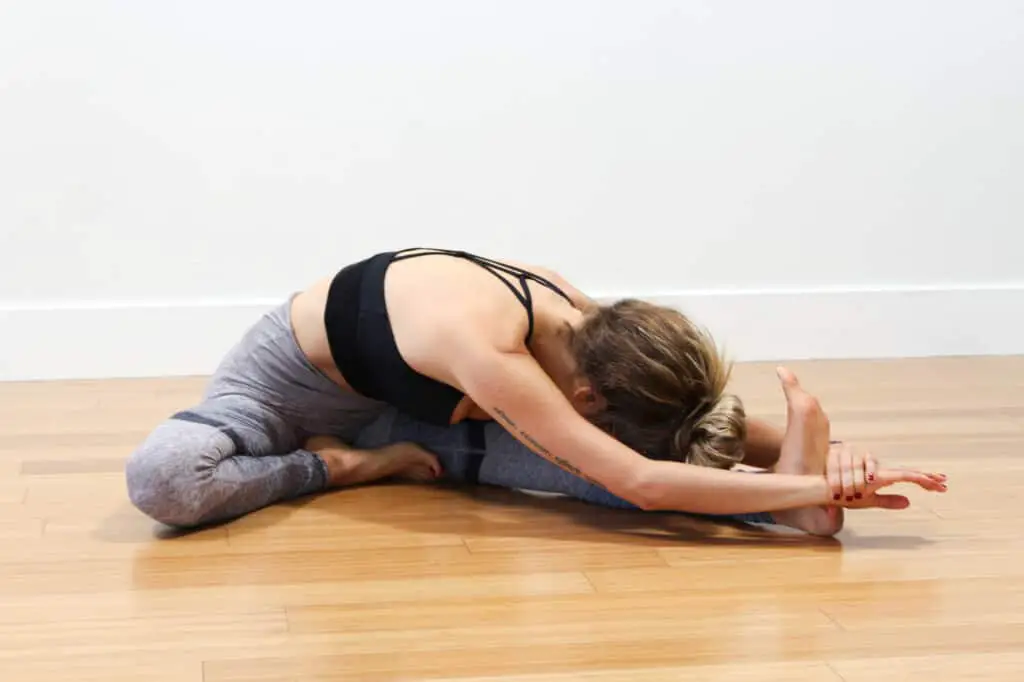
18: Head to Knee Pose
Head to the knee is another wonderful pose for stretching out your hips, groins, and hamstrings. If you take part in sports like running, you have probably done a pose similar to this one before. The steps are as follows:
- Start in Staff Pose. Bend your left leg and bring your foot towards your right thigh.
- Square your right up above your right leg. Begin reaching towards your right foot by bending your pelvis forward. Make sure to keep your right foot flexed towards the ceiling.
- Reach as far as you can, and hold that position for five or ten breaths.
- Do this again with the opposite leg.
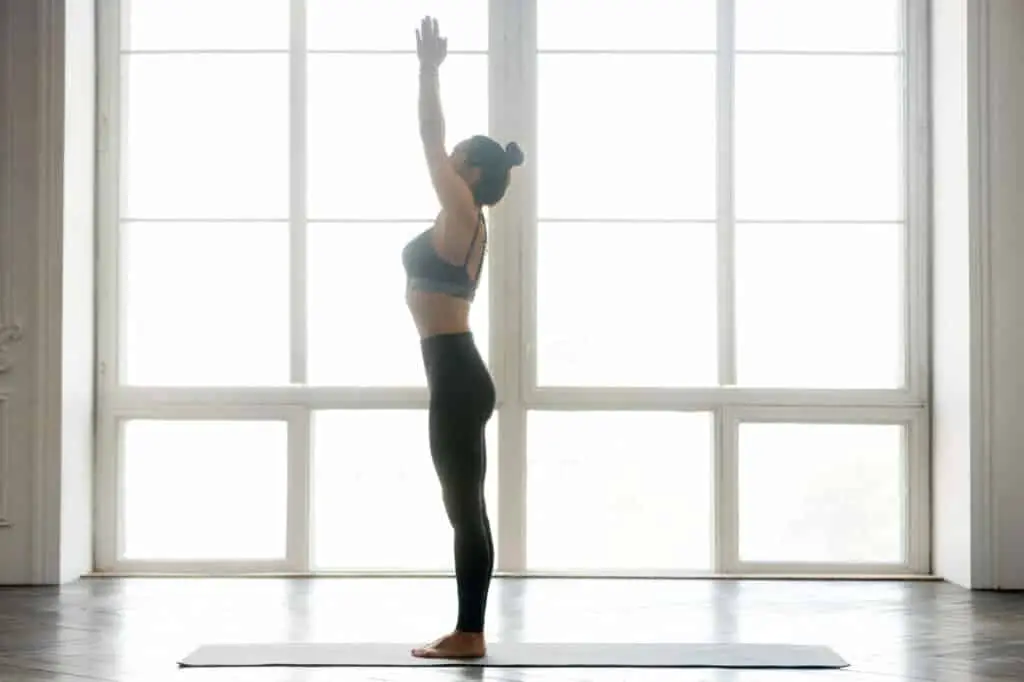
19: Raised Hands Pose
The Raised Hands Pose, also known as the Palm Tree Pose, is a simple variation of the Mountain Pose. This pose is a simple way to stretch out your upper body, especially your shoulders. To perform this pose, you need to:
- Start in the Mountain Pose.
- Pull your shoulders back and position your head above your pelvis. Make sure to keep your chin parallel to the floor.
- Push your arms over your head, keeping them above your shoulders.
- Cover your ears with your biceps and allow your shoulder blades to move away from your spine.
- Try to keep your arms straight and touch your palms together.
- Hold this pose for five or ten breaths.
20: Downward Dog
One of the most iconic yoga poses is Downward Dog and is one of the best poses to learn early on in your yoga practice. Downward Dog is a pose that requires concentration and is a great way to develop arm strength. The steps needed to do this iconic pose are:
- Start on your hands and knees. Let out a breath and lift your knees. Point your pelvis and tailbone towards the ceiling
- Exhale once more and push your thighs back without completely straightening your knees.
- Press your hands to the floor, keeping your shoulders, arms, wrists, and hands in one line. Make sure your head stays between your arms.
- Stay in this pose for at least five breaths.
Here is an example of the Downward Dog pose being performed.
Summary
We hope this article serves as a great introduction to Yoga. As you can see, there are many different kinds of yoga poses for beginners; from more relaxed, grounded poses like the Cobra Pose to beautiful and challenging poses such as the Dancer’s Pose.
Practicing just a few of these twenty poses will greatly improve your practice and give you a solid foundation to work off in the future.