Back pain is quite a modern problem for the simple reason that we sit much more often than our ancestors.
The sedentary lifestyle takes a heavy toll on the body, which often manifests itself in the form of back pain. Yoga has proven to be an excellent method for relieving back pain.
Below we will show you a few yoga poses for lower back pain.
15 Yoga Postures for Lower Back Pain
1. The cat and cow pose
Introduction
By synchronizing your breath with your movements, you can warm up your body. The blood begins to flow and by focusing on the movements and the breath, you begin the grounding work.
Benefits
– It relieves back pain.
– Focusing on the breath can help with stress.
– The pose can improve blood circulation.
How to practice
1. Assume a seated position.
2. Get on your knees and put your hands in a table-like position.
3. As you inhale, press your abdomen down and your chest forward.
4. Look straight ahead and inhale slowly.
5. Now press the abdomen in the opposite direction, arch the back and lower the head.
6. Breathe out slowly during this movement.
7. Repeat this movement a few times to warm up your spine and body.
2. Downward facing dog
Introduction
Shake up your body in this inverted posture. In this position can bring many benefits to your body and back.
Benefits
– It can improve circulation and blood flow.
– It stretches your lower back and takes the pressure off your spine.
– It can stretch your gluteal muscles and legs.
How to practice
1. First, lie down on your stomach.
2. Put your hands next to your chest.
3. Press your legs and hands down and push yourself up.
4. Press down with your hands, but push your hips up.
5. Stretch out your arms and legs.
6. Your whole body should be active during the pose.
7. Look at your legs and take a deep breath.
3. The Sphinx Pose
Introduction
The Sphinx Pose is a great back bending pose, that allows you to stretch your abdominal muscles and lengthen your spine.
Benefits
– It opens up your shoulders and chest.
– It can strengthen and lengthen your spine.
– A good pose for beginners.
How to practice
1. Lie on your stomach.
2. Support your forearms in front of you. Your elbows should be under your shoulders.
3. Now press your forearms down and lift your chest.
4. Pay attention to the back of your body. You should press your pelvis and legs down.
5. Look forward and breathe.
If you want to read more about this pose, check out this.
4. The grasshopper pose
Introduction
This is also a back-bending position. However, you can use more strength here and perhaps warm up your body more.
Benefits
– It can strengthen your entire core.
– It also improves the mobility of your spine.
– Opens up your chest and can improve your posture.
– It can help you with your breathing, which gives you energy.
How to practice:
1. Lie on your chest.
2. Put your arms at your sides, palms facing down.
3. You can put your forehead on the mat.
4. As you inhale, lift your chest and head.
5. Your arms should be behind you and you should push your shoulder blades together.
6. If you want to extend the pose further, you can lift your legs and feet.
7. Look to the floor and hold the pose for a few seconds.
5. The Plank Pose
Introduction
A powerful pose that strengthens your body and has great benefits for your spine. One minute of plank can feel like a lifetime, but it is worth the pain.
Benefits
– It activates your whole body and can strengthen it that way.
– You can also strengthen your spine, which has a positive effect on your posture.
How to practice:
1. Lie down on your mat and stand on a table.
2. Press your whole body upwards, forming a straight line with your body.
3. To check if your spine is straight, tilt your pelvis down and up.
4. Also pay attention to your abdomen. It should not sag but be activated and flexed.
5. Press up evenly with your hands and feet and breathe.
6. Hold this posture for a few seconds or as long as you can.
6. Pigeon Pose
Intrduction
This pose combines flexibility and strength. It can open up your hips and back. Because the hips can store emotions, this pose can open them up and help you release negative energy.
Benefits
- It can help you stretch out and open up your hips.
- It can be beneficial to your lower back.
- It may lower stress levels, by releasing stuck emotions.
How to practice:
1. Firstly, go into the downward-facing dog position.
2. Just push yourself up from a tabletop position.
3. This shape looks like an upside-down V position.
4. Raise one leg and bring your knees in and your leg in front of the mat.
5. Bend your knees and try putting your legs down.
6. Put your knees down first and then the rest of your leg.
7. Your hips should be straight and you should be looking forward.
8. If your knees hurt get out of the position. Or if your hips feel too tight, put some pillows under them.
7. Triangle Pose
Introduction
In this position by lengthening your body, you can stretch out your hips and groin. You can start from a beginner’s level and work yourself up.
Benefits
- It can open up your chest and hips
- It takes the focus onto the back and by doing that, you can help realize stress from the lower back.
How to practice:
1. Start by facing the long side of your mat.
2. Your toes on one side should face in front of the mat and the others should be at a 45-degree angle.
3. Reach out in front of you and put one of your hands down on the floor or the shins.
4. Reach out with your other hand and lookup.
5. Your neck should be in line with your spine and you should rotate your ribcage up to the sky.
6. Hold for a couple of seconds and repeat this on the other side.
8. Forward Bend Pose
Introduction
This beginner-friendly pose can stretch your whole body and is usually practiced after a more challenging pose. It is also a good way to draw breath.
Benefits
– It stretches your hamstrings, hips, and calves.
– It helps you straighten your spine and keep it flexible.
– In this pose, you can rest and relax your muscles and mind by breathing deeply.
How to practice
1. Stand in the center of your mat.
2. Take a deep breath and raise your arms.
3. Now bend your upper body to your legs and try to touch the floor with your fingertips.
4. The goal is to push your chest towards your legs, not your head.
5. The spine should be straight, but if you find it too strenuous, bend your knees.
6. You can swing from side to side and try to hold the pose a little.
7. You can repeat this pose every few poses.
9. Half Lord of the Fishes
Introduction
This pose can feel like a warm hug to your spine. Turn and hug yourself.
Benefits
– It can help stretch your shoulders and neck.
– Helps with spinal mobility.
– It can relieve back pain and tension.
How to practice:
1. Sit on your mat and stretch your legs out in front of you.
2. Bend one leg toward you and place the other leg on the outside of the bent leg.
3. Straighten your spine and raise your arms.
4. Slowly turn to the opposite side and hook your elbow with your legs.
5. Look back and gaze in that direction. Do not forget to turn your upper body in this direction as well.
6. Take a deep breath in and out. Repeat this on your other side as well.
10. Bow pose
Introduction
This might be an intermediate pose but with a little help, everybody can do it. This pose is great for targeting your back and chest.
Benefits
- It is great for a stiff back because it stretches the lower back out.
- At the same time, it opens up the chest and shoulders.
How to practice
1. Lay down on your stomach and put your forehead on the mat.
2. Bend your knees and bring them as close as possible to your buttocks.
3. Make sure your knees are not too far apart.
4. If you can, take hold of your ankles and pull yourself and your legs up.
5. Your pelvis should stay on the ground and you should look ahead.
6. The more you pull your legs up, the more of a stretch you will feel.
11. Bridge Pose
Introduction
Make your yoga practice fun and do a bridge pose. Not only it is a fun pose, it is great for lower back pain.
Benefits
- It can improve circulation.
- Helps to stretch out your back and chest at the same time.
How to practice
1. Start by laying down on your back.
2. Bend your knees and put your legs close to your buttocks.
3. You should be able to touch your legs with your fingertips. Don’t worry if you can’t, then just place your feet at a comfortable distance.
4. Slowly push your buttocks up and move your shoulders under you.
5. You can catch and lock your hands.
6. Tuck in your chest and breathe.
12. Wheel Pose
Introduction
If you got the hang of bridge pose, you can up your game with wheel pose.
Benefits
- As a bridge pose, this one also opens up your chest and lower back.
- Its pose can help you strengthen your core and hand muscles.
How to practice
1. Start by warming up the body with a bridge pose.
2. Now you move your hands beside your head and put your palms down.
3. First push your head up a little bit, and place the top of the head onto the mat.
4. Then push yourself up and push your chest outside.
5. Try straightening your arms and legs.
6. Hold this pose and breathe.
13. Extended Puppy Pose
Introduction
After backends, it is good to stretch your back out in a little different way. This pose will do just that.
Benefits
- It helps with chronic tension and lower back pain.
- It can stretch out the spine.
How to practice:
1. Get into tabletop position.
2. Your hips should be stacked on your knees.
3. Slowly start walking with your hands in front of you.
4. Drop your chest to the floor and reach out to stretch your spine.
5. Activate your hands and flex your core.
6. Hold the pose as you breathe.
14. Happy Baby Pose
Introduction
Slowly finish your yoga practice for lower back pain. The Happy Babby pose is a great unwinding position.
Benefits
- It helps to release the tension in your back.
- It stretches out the tights, hamstrings, and groin.
How to practice
1. Lay down on your mat.
2. Bend your knees and take a hold of your legs.
3. Try pushing your knees into your armpits. It doesn’t need to go all the way there, you just need to focus on that direction.
4. You can rock side to side.
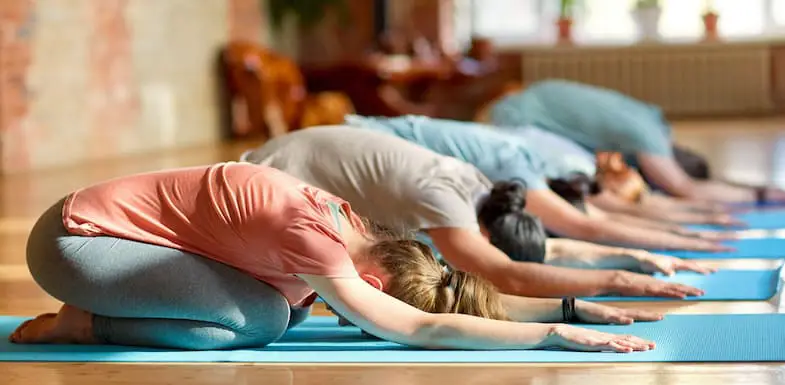
15. Child’s pose
Introduction
To finish your practice, get down to the child pose and let your body rest.
Benefits
- It is a great position to stretch out your back and neck.
- It is also a very peaceful position, where you can focus on your breath and rest.
How to practice
1. Sit down on your knees, resting your buttocks on your heels.
2. Bend forward onto your legs and walk your arms in front of you.
3. Hold the pose as long as you wish and breathe normally.
Conclusion
You are not the only one who suffers from back pain, and you are not the only one who turns to yoga to relieve that pain. More and more people are turning to yoga to strengthen their bodies and find peace in everyday life.
However, make sure you practice with care and follow the teacher so that your condition does not worsen. Read more about how to practice yoga in a safe way:
If you know of any other poses for lower back pain, let us know in the comments!